Guided Tutorial
This tutorial is meant to be followed step by step so you can get a basic understanding of Openshift and Openshift objects. This will only cover a very surface level knowledge of all the things you can accomplish with Openshift but will hopefully get you familiar with the foundational concepts.
Caution
You will be creating a single Pod in this tutorial which is not sufficient for a production service
If you have not already done so, you will need to get an allocation on either our Marble or Onyx Cluster. To do this contact help@olcf.ornl.gov.
Before we dive in there are some terms that need to be understood. This will be a basic set of terms and a copy and paste from our Glossary, so we recommend reading that document and even keeping it handy until you are familiar with all of the definitions there. On that note, another good piece of reference documentation the YAML Object Quick Reference document. There you can find basic YAML definitions for the most common objects in Kubernetes.
Creating your project
Before you can do anything you need a Project to do your things in. Fortunately, when you get an allocation on one of our clusters a Project is automatically created for you with the same name as the allocation. By using our own distinct Project we are ensuring that we will not interfere with anyone else’s work.
NOTE: Everywhere that you see <cluster> replace that with the cluster that you will be running on (marble or onyx).
Now that you have a project you can create objects inside that project. We will be doing this with the Openshift Web GUI and the oc CLI client so you can use whichever interface you are more comfortable with in this tutorial. If you are more comfortable using the command line than you are using a GUI you can now jump to the oc portion of this document. Otherwise, continue with the GUI based tutorial below.
Guided Web GUI Tutorial
Go to https://console-openshift-console.apps.<cluster>.ccs.ornl.gov/k8s/cluster/projects
Adding a Pod to your Project
Once you have navigated to https://console-openshift-console.apps.<cluster>.ccs.ornl.gov/k8s/cluster/projects you should see a list of Projects or Namespaces, that you have access to. Scroll down or use the filter box in the upper right to select your project; your project will have the same name as your allocation in RATS. Once there your screen should look similar to the picture below:
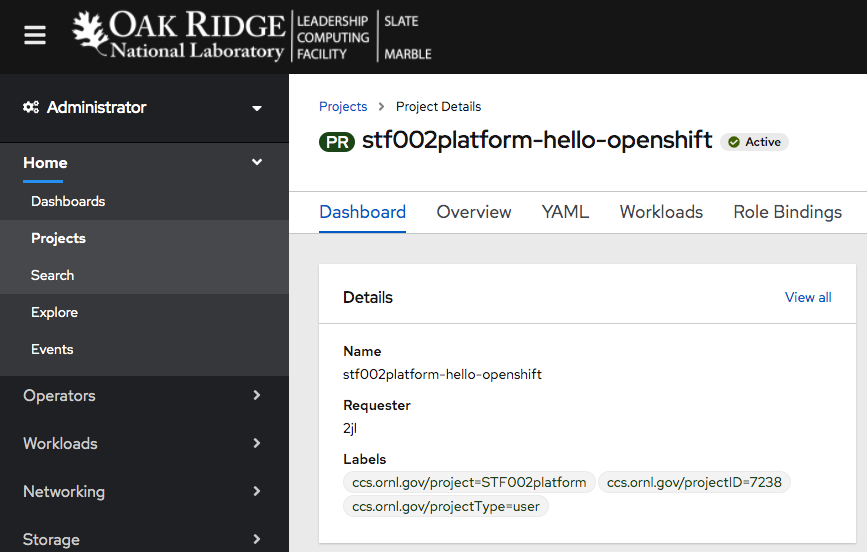
Note
The name of the pictured project is of the form RATS_ALLOCATION-CUSTOM_NAME. Your project will be only RATS_ALLOCATION.
From here, in the left hand hamburger menu click on the ‘Workloads’ tab and then the ‘pods’ tab:
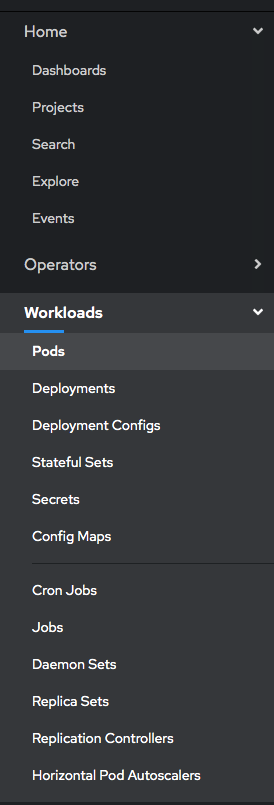
Here you will be able to view all of the Pods in your Project. Since this is a new Project there will be no Pods in it. To create a Pod click the ‘Create Pod’ button.
This will bring you to a screen of pre populated YAML that you can edit in the browser. This YAML is the basis of a podspec that will be sent to the API server once you click the ‘Create’ button in the lower left to create a Pod in your Project. Here we will make a few slight modifications to the podspec.
First, we will replace the openshift/hello-openshift value after the image tag with value image-registry.openshift-image-registry.svc:5000/openshift/ccs-rhel7-base-amd64. This is the Image that the Pod will be using. We will be using the ccs-base image; a bare-bones image provided by the platforms team that is usually used as the foundation to build more complex custom images on top of.
Secondly, the Pod needs something to do when it starts. For an nginx server this would be running nginx, for a flask app this would be running the app.py file etc. For illustrative purposes this Pod is going to be starting a shell with the /bin/sh command, echoing a “Hello World!” prompt then running a cat command as a means to keep the pod running. Without the addition of the cat at the end the echo command would end causing the /bin/sh to end causing the Pod to go from a status of Running to Completed. To make these changes add the following lines below the image line:
command: ["/bin/sh","-c"]
args: ["echo 'Hello World!'; cat"]
Finally, we need a tty. This will give us the ability to open a shell in our Pod and get a better understanding of what is happening. To do this, add the following two lines under the command line that you just added:
tty: true
stdin: true
Your page should now look as follows:
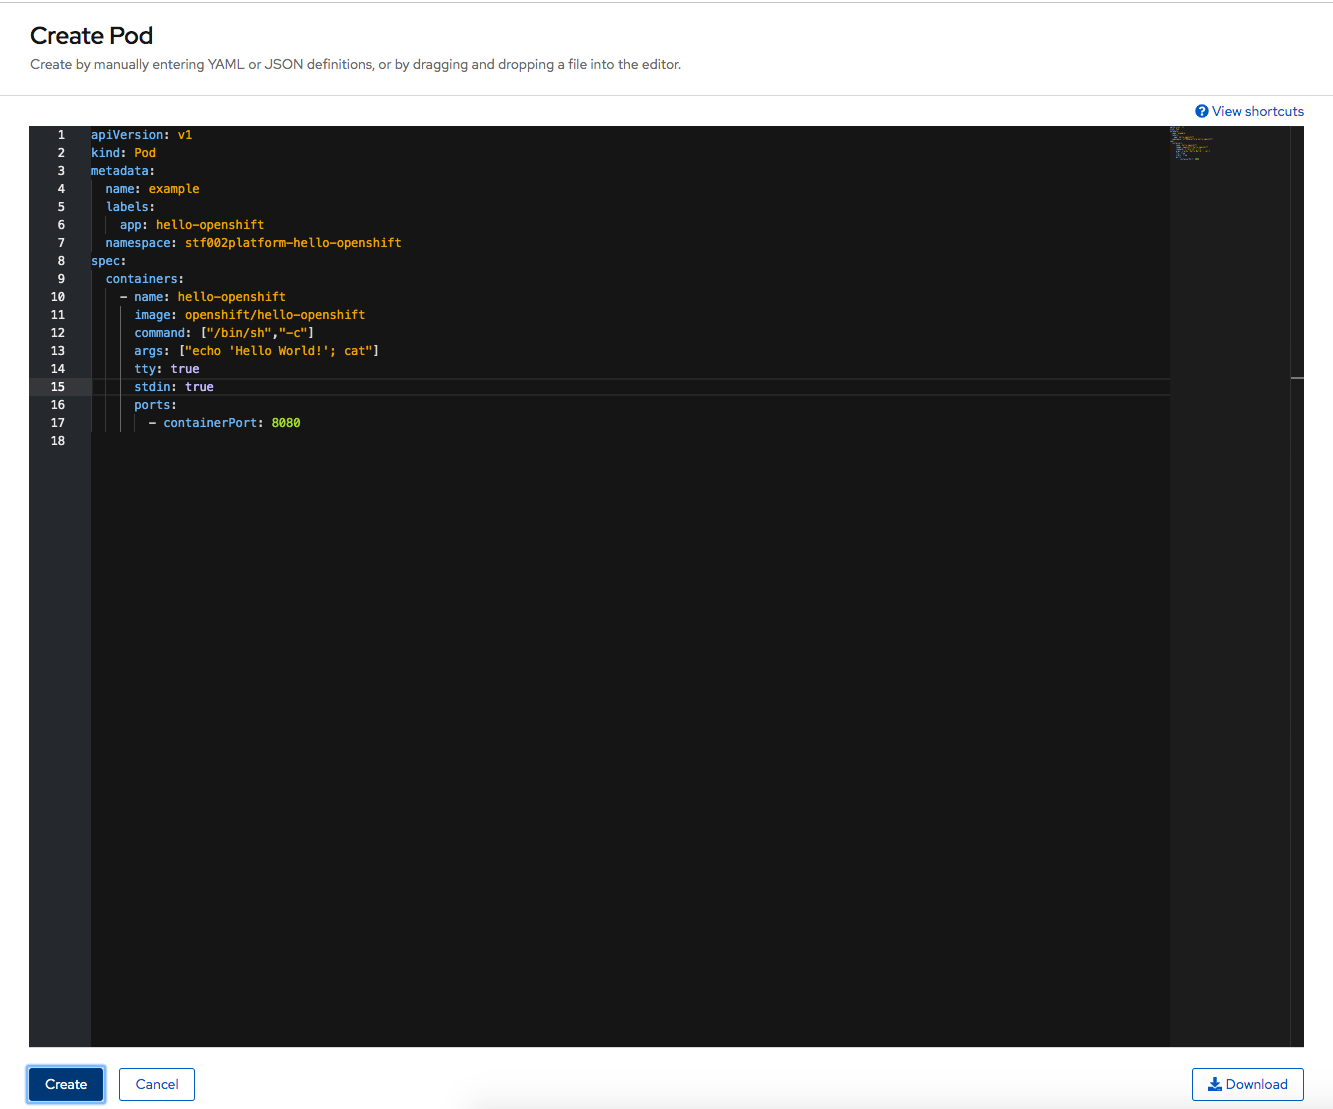
You can now click the ‘Create’ button in the lower left which will take you to the screen where the Pod is created.
You should now be on the ‘Pod’ screen with the ‘Overview’ tab selected. From here you can get a quick idea of the amount of resources (memory, CPU etc) that your Pod is using.
Click on the ‘Logs’ tab to get the logs from your pod. This will display “Hello World!” in our example because of our echo command. There will be a dropdown here that, for our example, will contain only one item named ‘hello-openshift’. This is the name of the container that you are viewing the logs for inside your pod.
The ‘Events’ tab is for the events that took place to create your pod. This is for things that happen outside of the code that is running inside your pod such as pulling the pod image, scheduling the pod onto a node etc.
The ‘Terminal’ tab will give you a tty inside your pod. Here you can run most commands as you normally would on a RedHat machine.