ParaView
Warning
July 7, 2026: The UMS installations on Frontier are currently upgrading dependencies and are not usable at this time.
Overview
ParaView is an open-source, multi-platform data analysis and visualization application. ParaView users can quickly build visualizations to analyze their data using qualitative and quantitative techniques. The data exploration can be done interactively in 3D or programmatically using ParaView’s batch processing capabilities. Further information regarding ParaView can be found at the links provided in the Additional Resources section.
ParaView was developed to analyze extremely large datasets using distributed memory computing resources. The OLCF provides ParaView server installs on Andes and Frontier to facilitate large scale distributed visualizations. The ParaView server may be used in a headless batch processing mode or be used to drive a ParaView GUI client running on your local machine.
For a tutorial of how to get started with ParaView on OLCF systems, see our ParaView on Frontier tutorial. The tutorial walks through visualizing examples on Frontier, but applies to other OLCF systems as well.
An older tutorial using Andes can be found here: ParaView at OLCF 2022
Installing and Setting Up ParaView
Although in a single machine setup both the ParaView client and server run on the same host, this need not be the case. It is possible to run a local ParaView client to display and interact with your data while the ParaView server runs in an Andes or Frontier batch job, allowing interactive analysis of very large data sets.
You will obtain the best performance by running the ParaView client on your
local computer and running the server on OLCF resources with the same version
of ParaView. It is highly recommended to check the available ParaView versions
using module avail paraview on the system you plan to connect ParaView to.
Precompiled ParaView binaries for Windows, macOS, and Linux can be downloaded
from Kitware.
Recommended ParaView versions on our systems:
- Andes:
OLCF Installation: ParaView 5.9.1, 5.10.0, 5.11.0, 5.12.1, 5.13.1, 5.13.3, 6.0.0
- Frontier:
UMS032 Installation: ParaView 5.11.2, 5.12.1, 5.13.1
OLCF Installation: ParaView 5.13.1, 5.13.2, 5.13.3
Warning
Using a different version than what is listed above is not guaranteed to work properly.
We offer two rendering modes of the ParaView API on our systems: OSMesa and EGL. OSMesa is intended for use on regular compute nodes, whereas EGL is intended for use on GPU enabled nodes. When running interactively, you do not need to download or install anything special to use the EGL or OSMesa versions, as you’ll be able to choose between those options when connecting to the system (see Remote GUI Usage below). If instead you’re running in batch mode on the command line (see Command Line Example below), you can choose between the rendering options by loading its corresponding module on the system you’re connected to. For example, to see these modules on specific OLCF systems:
$ module -t avail paraview

/sw/andes/modulefiles/core:
paraview/5.9.1-egl
paraview/5.9.1-osmesa
paraview/5.10.0-egl
paraview/5.10.0-osmesa
paraview/5.11.0-egl
paraview/5.11.0-osmesa
paraview/5.12.1-egl
paraview/5.12.1-osmesa
paraview/5.13.1-egl
paraview/5.13.1-osmesa
paraview/5.13.3-egl
paraview/5.13.3-osmesa
paraview/6.0.0-egl-osmesa
paraview/6.0.0
Note
The EGL mode seems to work better with larger datasets and is generally recommended over OSMesa on our systems. However, we encourage users to try both options and see which version works best for their data.
$ module load ums
$ module load ums032
$ module load dav-sdk
$ module -t avail paraview

/sw/frontier/ums/ums032/modules:
paraview/5.11.2-rocm
paraview/5.11.2
paraview/5.12.1-rocm
paraview/5.12.1
paraview/5.13.1-rocm
paraview/5.13.1
$ module load PrgEnv-gnu/8.6.0
$ module load gcc-native/13.2
$ module load rocm # needed to see the GPU-enabled modules
$ module -t avail paraview

/sw/frontier/spack-envs/modules/gcc/13.2/cray-mpich-8.1.31/rocm-6.2.4/gcc-13.2:
paraview/5.12.0-gpu-mpi
paraview/5.13.1-gpu-mpi
paraview/5.13.2-gpu-mpi
/sw/frontier/spack-envs/modules/gcc/13.2/cray-mpich-8.1.31/gcc-13.2:
paraview/5.12.0-mpi
paraview/5.13.1-mpi
paraview/5.13.2-mpi
Note
ParaView 5.13.3 depends on cpe/25.09 and gcc-native/14.2 so does not show in the above list.
After installing, you must give ParaView the relevant server information to be able to connect to OLCF systems (comparable to VisIt’s system of host profiles). The following provides an example of doing so. Although several methods may be used, the one described should work in most cases.
Warning
For macOS clients, it is necessary to install XQuartz (X11) to get a command prompt in which you will securely enter your OLCF credentials.
For Windows clients, it is necessary to install PuTTY to create an ssh connection in step 2.
Step 1: Save the following PVSC files to your local computer
Note
Although they can be separate files, all OLCF server
configurations can be combined and saved into one file following the hierarchy
<Servers><Server name= >...<\Server><Server name= >...<\Server><\Servers>.
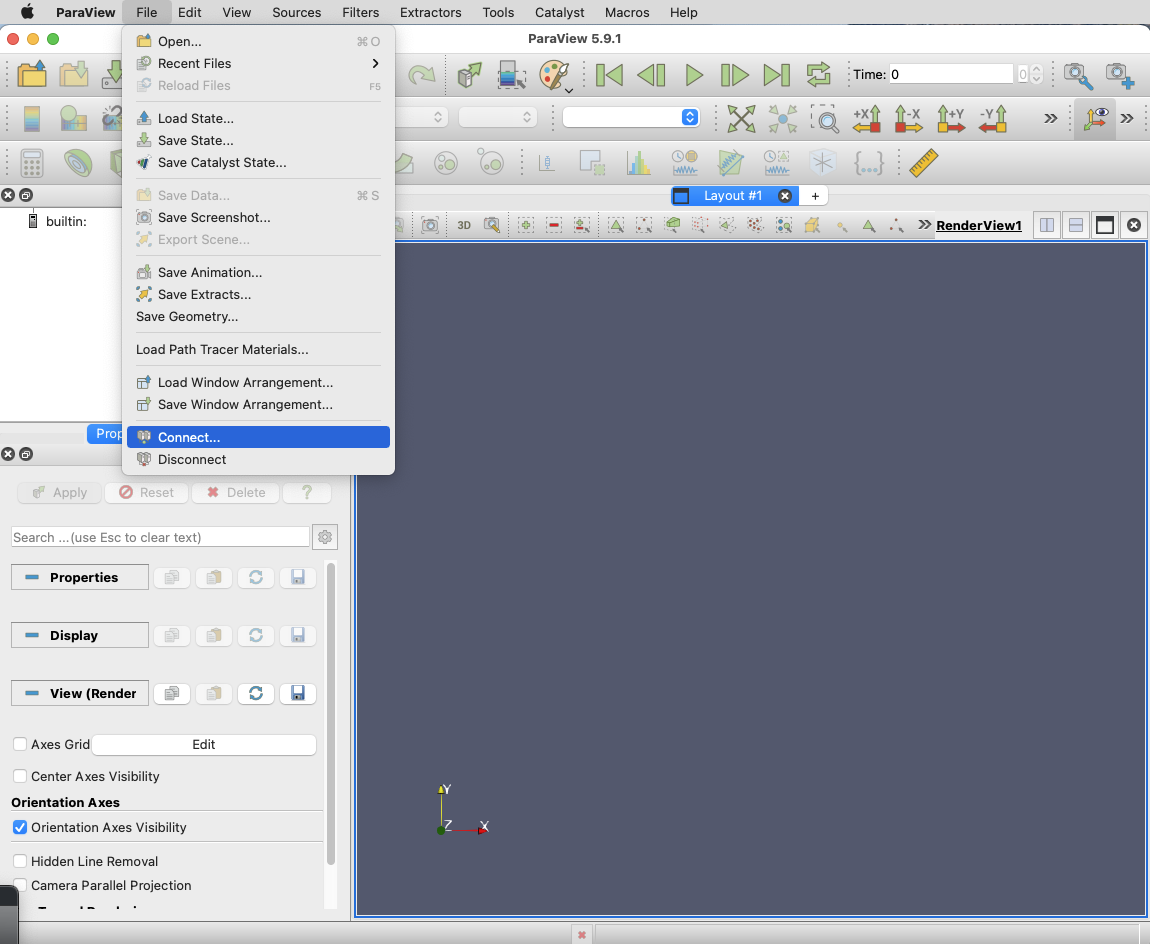
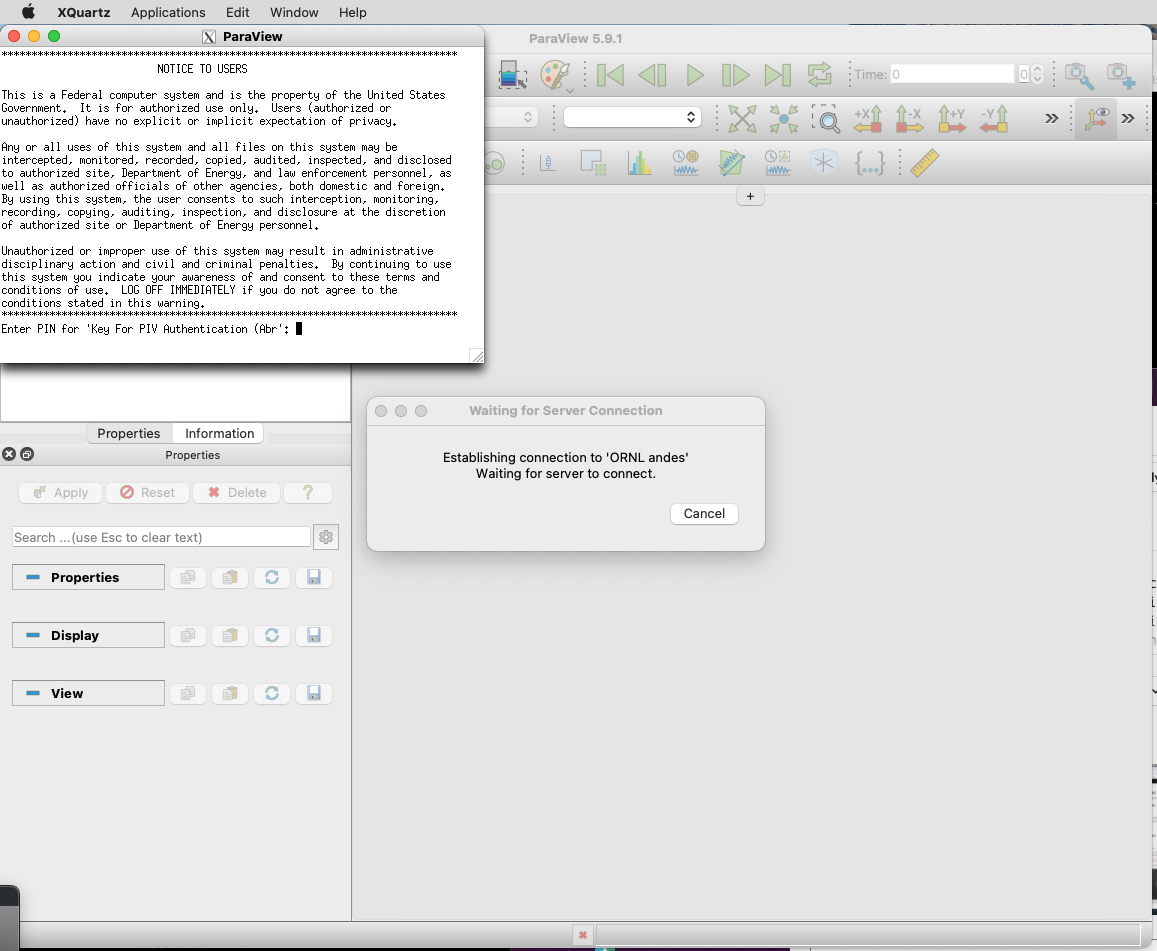
Step 2: Launch ParaView on your Desktop and Click on File -> Connect
Start ParaView and then select File/Connect to begin.
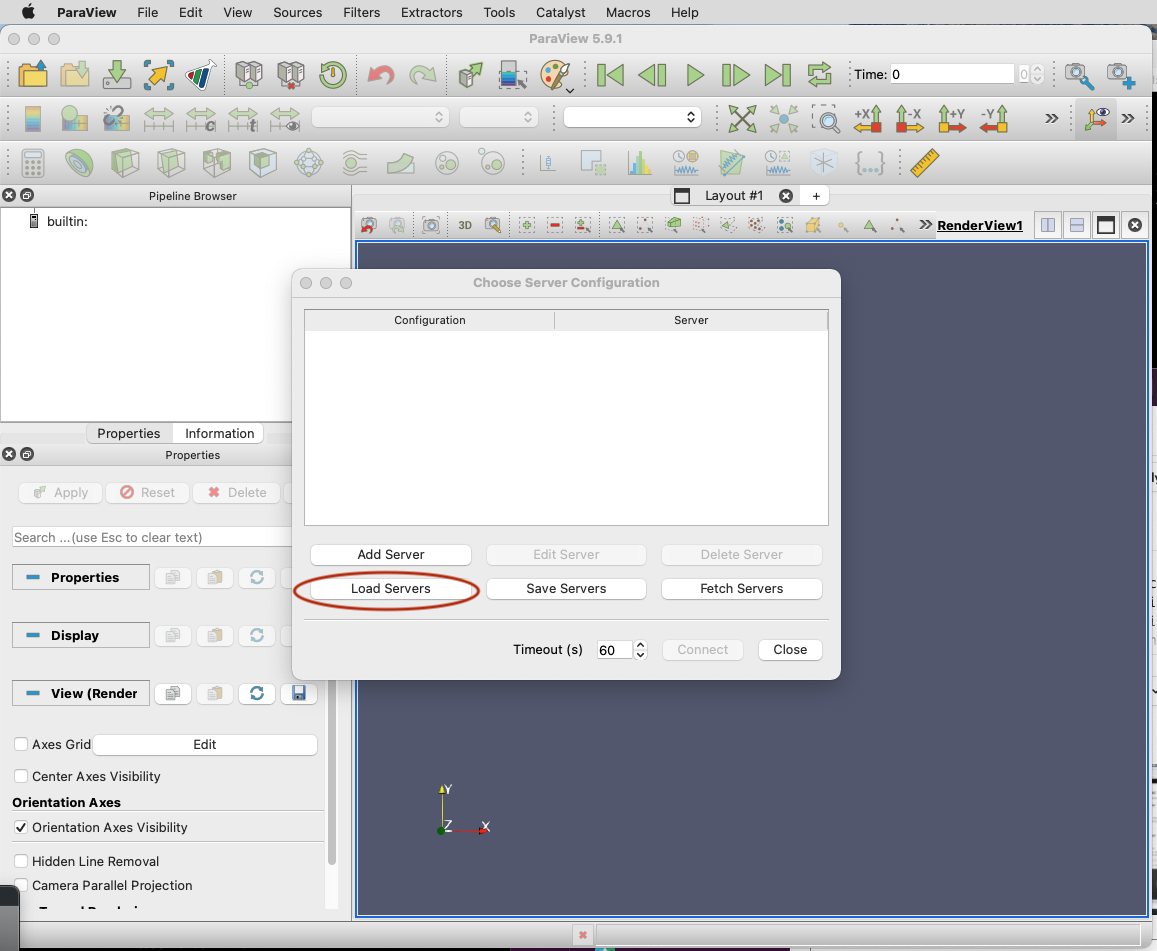
Step 3: Import Servers
Click Load Servers button and find the desired pvsc file
Note
The Fetch Servers button fetches
Official Kitware Server Configurations.
Andes and Frontier configurations can be imported through this method, but are
not guaranteed to be supported in future updates. Users may use these at their own risk.
After successfully completing the above steps, you should now be able to connect to either Andes or Frontier.
Remote GUI Usage
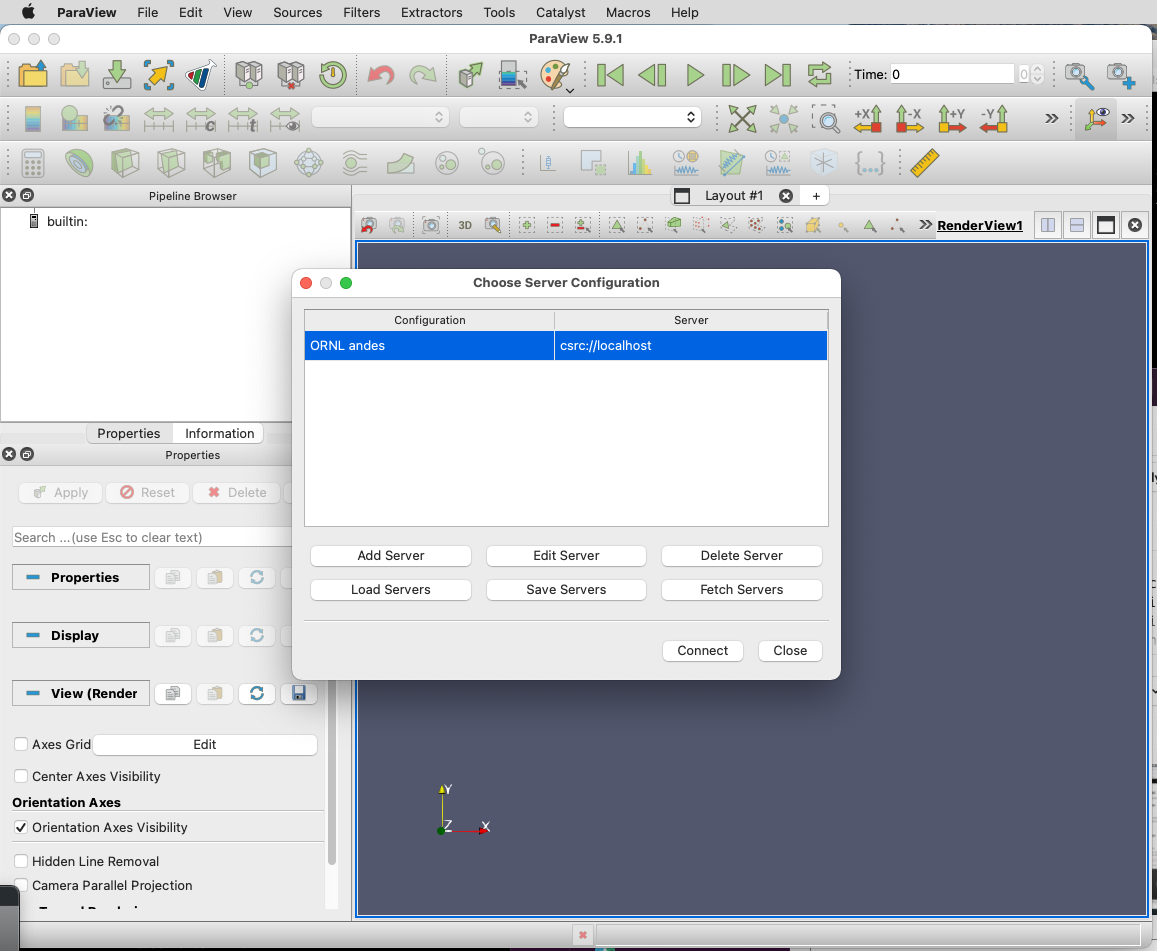
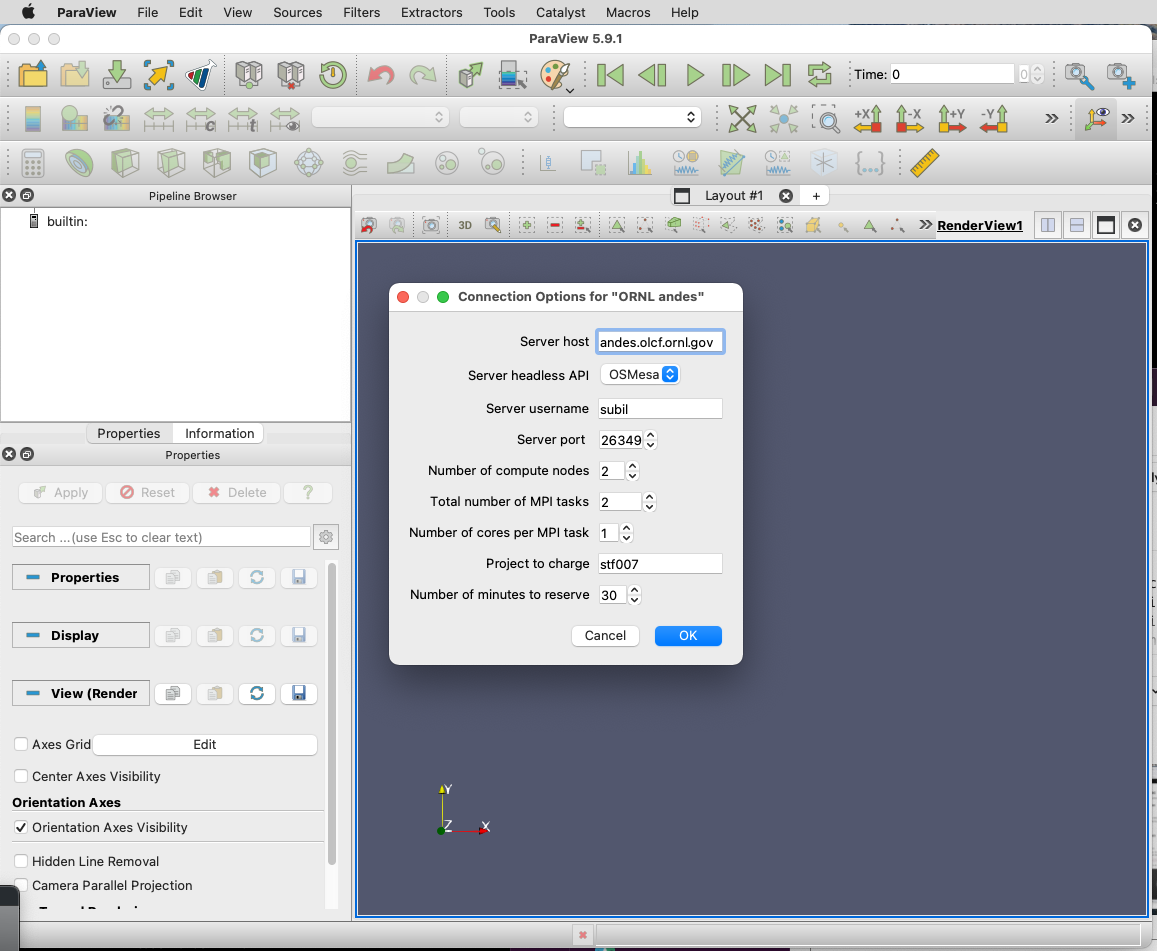
After setting up and installing ParaView, you can connect to OLCF systems remotely to visualize your data interactively through ParaView’s GUI. To do so, go to File→Connect and select either ORNL Andes or ORNL Frontier (provided they were successfully imported – as outlined in Installing and Setting Up ParaView). Next, click on Connect and change the values in the Connection Options box.
A dialog box follows, in which you must enter in your username and project allocation, the number of nodes to reserve and a duration to reserve them for. This is also where you can choose between the OSMesa and EGL (ROCm for Frontier) rendering options via the “Server headless API” box.
When you click OK, a windows command prompt or xterm pops up. In this
window enter your credentials at the OLCF login prompt.
When your job reaches the top of the queue, the main window will be returned to your control. At this point you are connected and can open files that reside there and visualize them interactively.
Creating a Python Trace
One of the most convenient tools available in the GUI is the ability to convert (or “trace”) interactive actions in ParaView to Python code. Users that repeat a sequence of actions in ParaView to visualize their data may find the Trace tool useful. The Trace tool creates a Python script that reflects most actions taken in ParaView, which then can be used by either PvPython or PvBatch (ParaView’s Python interfaces) to accomplish the same actions. See section Command Line Example for an example of how to run a Python script using PvBatch on Andes and Frontier.
To start tracing from the GUI, click on Tools→Start Trace. An options window will pop up and prompt for specific Trace settings other than the default. Upon starting the trace, any time you modify properties, create filters, open files, and hit Apply, etc., your actions will be translated into Python syntax. Once you are finished tracing the actions you want to script, click Tools→Stop Trace. A Python script should then be displayed to you and can be saved.
Command Line Example
Warning
Using ParaView via the command line should always be done through a batch job, and should always be executed on a compute node – never the login or launch nodes.
ParaView can be controlled through Python without opening the ParaView GUI. To do this on OLCF systems, one must use a batch script in combination with PvBatch (one of the Python interfaces available in ParaView). PvBatch accepts commands from Python scripts and will run in parallel using MPI. Example batch scripts, along with a working Python example, are provided below.
 1#!/bin/bash
 2#SBATCH -A XXXYYY
 3#SBATCH -J para_test
 4#SBATCH -N 1
 5#SBATCH -p batch
 6#SBATCH -t 0:05:00
 7
 8cd $SLURM_SUBMIT_DIR
 9date
10
11module load paraview/5.12.1-osmesa
12
13srun -n 28 pvbatch para_example.py
 1#!/bin/bash
 2#SBATCH -A XXXYYY
 3#SBATCH -J para_test
 4#SBATCH -N 1
 5#SBATCH -p batch
 6#SBATCH -t 0:05:00
 7
 8cd $SLURM_SUBMIT_DIR
 9date
10
11module load ums
12module load ums032
13module load dav-sdk
14module load paraview/5.12.1
15
16srun -n 28 pvbatch para_example.py
Warning
If you plan on using the EGL version of the ParaView module (e.g.,
paraview/5.12.1-egl), then you must be connected to the GPUs. On Andes,
this is done by using the gpu partition via #SBATCH -p gpu.
Submitting one of the above scripts will submit a job to the batch partition
for five minutes using 28 MPI tasks across 1 node. As rendering speeds and
memory issues widely vary for different datasets and MPI tasks, users are
encouraged to find the optimal amount of MPI tasks to use for their data. Users
with large datasets may also find a slight increase in performance by using the
gpu partition on Andes, or by utilizing the GPUs on Frontier. Once the batch job
makes its way through the queue, the script will launch the loaded ParaView
module (specified with module load) and execute a python script called
para_example.py using PvBatch. The example python script is detailed below,
and users are highly encouraged to use this script (especially after version
upgrades) for testing purposes.
The following script renders a 3D sphere colored by the ID (rank) of each MPI task:
 1# para_example.py:
 2from paraview.simple import *
 3
 4# Add a polygonal sphere to the 3D scene
 5s = Sphere()
 6s.ThetaResolution = 128                        # Number of theta divisions (longitude lines)
 7s.PhiResolution = 128                          # Number of phi divisions (latitude lines)
 8
 9# Convert Proc IDs to scalar values
10p = ProcessIdScalars()                         # Apply the ProcessIdScalars filter to the sphere
11
12display = Show(p)                              # Show data
13curr_view = GetActiveView()                    # Retrieve current view
14
15# Generate a colormap for Proc Id's
16cmap = GetColorTransferFunction("ProcessId")   # Generate a function based on Proc ID
17cmap.ApplyPreset('Viridis (matplotlib)')       # Apply the Viridis preset colors
18#print(GetLookupTableNames())                  # Print a list of preset color schemes
19
20# Set Colorbar Properties
21display.SetScalarBarVisibility(curr_view,True) # Show bar
22scalarBar = GetScalarBar(cmap, curr_view)      # Get bar's properties
23scalarBar.WindowLocation = 'Any Location'       # Allows free movement
24scalarBar.Orientation = 'Horizontal'           # Switch from Vertical to Horizontal
25scalarBar.Position = [0.15,0.80]               # Bar Position in [x,y]
26scalarBar.LabelFormat = '%.0f'                 # Format of tick labels
27scalarBar.RangeLabelFormat = '%.0f'            # Format of min/max tick labels
28scalarBar.ScalarBarLength = 0.7                # Set length of bar
29
30# Render scene and save resulting image
31Render()
32SaveScreenshot('pvbatch-test.png',ImageResolution=[1080, 1080])
Warning
For older versions of ParaView (e.g., 5.9.1), line 23 should be 'AnyLocation' (no space).
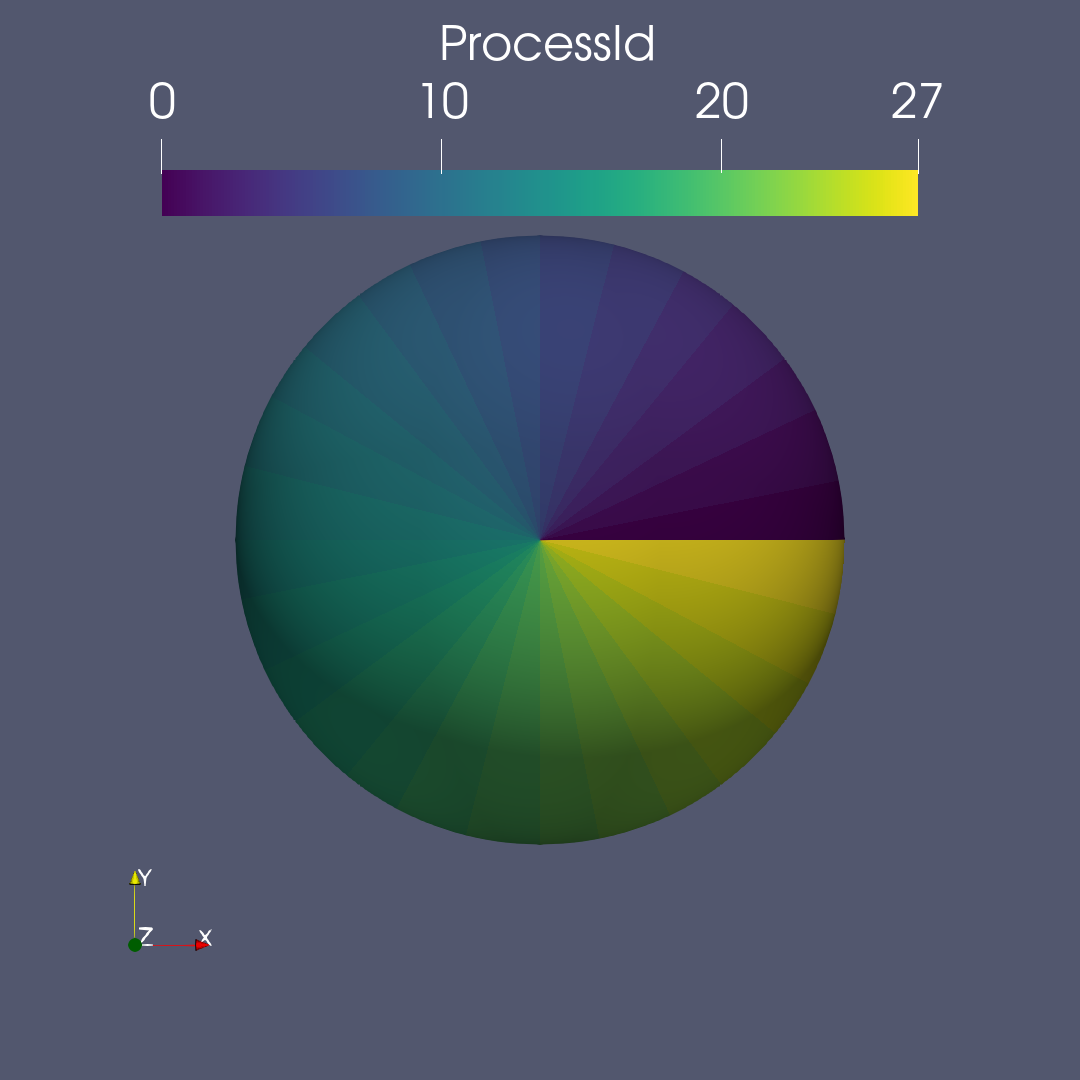
If everything is working properly, the above image should be generated after the batch job is complete.
All of the above can also be achieved in an interactive batch job through the
use of the salloc command on Andes and Frontier.
Recall that login nodes should not be used for memory- or compute-intensive tasks, including ParaView.
Troubleshooting
Process failed to start connection issue (or DISPLAY not set)
If ParaView is unable to connect to our systems after trying to initiate a connection via the GUI and you see a “The process failed to start. Either the invoked program is missing, or you may have insufficient permissions to invoke the program” error, make sure that you have XQuartz (X11) installed.
For macOS clients, it is necessary to install XQuartz (X11) to get a command prompt in which you will securely enter your OLCF credentials.
After installing, if you see a “Can’t open display” or a “DISPLAY is not set” error, try restarting your computer. Sometimes XQuartz doesn’t function properly if the computer was never restarted after installing.
ParaView crashes when using the EGL API module via command line
If ParaView crashes when using the EGL version of the ParaView module via the command line and raises errors about OpenGL drivers or features, this is most likely due to not being connected to any GPUs.
Double check that you are either running on the GPU partition on Andes (i.e.,
-p gpu).
If problems persist and you do not need EGL, try using the OSMesa version of the module instead (e.g., paraview/5.9.1-osmesa instead of paraview/5.9.1-egl).
Default Andes module not working with PvBatch or PvPython (Aug. 31, 2021)
A command not found error occurs when trying to execute either PvBatch or
PvPython after loading the default ParaView module on Andes. To fix this, you
must load the equivalent ParaView module ending in “pyapi” instead (i.e.,
module load paraview/5.9.1-py3-pyapi instead of module load
paraview/5.9.1-py3).
Alternatively, the ParaView installations in /sw/andes/paraview (i.e., the
paraview/5.9.1-egl and paraview/5.9.1-osmesa modules) can also be loaded to
avoid this issue.
Additional Resources
The ParaView on Frontier tutorial highlights how to get started on OLCF systems with example datasets.
The Official ParaView User’s Guide and the Python API Documentation contain all information regarding the GUI and Python interfaces.
A full list of ParaView Documentation can be found on ParaView’s website.
The ParaView Wiki contains extensive information about all things ParaView.
Tutorials can be found on the ParaView Wiki at The ParaView Tutorial and SNL ParaView Tutorials.
Sample Data not pre-packaged with ParaView can be found on the ParaView download page under the Data section.
Specific ParaView Versions and their Release Notes can be found on the ParaView website and ParaView Wiki, respectively.
Non-ORNL related bugs and issues in ParaView can be found and reported on Discourse.