OpenShift GitOps
From the release notes:
Red Hat OpenShift GitOps is a declarative way to implement continuous deployment for cloud native applications. Red Hat OpenShift GitOps ensures consistency in applications when you deploy them to different clusters in different environments, such as: development, staging, and production.
In addition to multiple operators, Red Hat OpenShift GitOps provides RBAC roles and bindings, default resource request limits, integration with Red Hat SSO, integration with OpenShift cluster logging as well as cluster metrics, ability to manage resources across multiple OpenShift clusters with a single OpenShift GitOps instance, automatic remediation if resource configuration changes from desired configuration, and promotion of configurations from dev to test/staging to production.
Resources
To foster collaboration, discussion, and knowledge sharing, the CNCF GitOps Working Group held GitOpsCon North America 2021 with sessions concerning GitOps in general practice as well as specific tools. Additionally, there are two awesome lists where one may find more information concerning GitOps and tools:
The former is curated by one of the committers to the ArgoCD project while the latter is curated by Weaveworks. The remainder of this document is focused solely on the use of the Red Hat OpenShift GitOps operator.
Installation
The Red Hat OpenShift GitOps operator is already installed onto each of the Slate clusters. However, to use ArgoCD an instance will need to be added into a project namespace. If one is to use ArgoCD to manage resources in a single project, then the ArgoCD instance could be located in the same project as the resources being managed. However, if the application being managed is resource (CPU and memory) sensitive or if resources in multiple projects are to be managed, it may be better to have the ArgoCD instance deployed into a separate project to allow for better control of resources allocated to ArgoCD.
Note
If a sub project is being setup under the main project for deployment of ArgoCD, allocate at least 6 CPU, 5 Gi memory, and 5 Gi storage resources. Once deployed, these may need to be adjusted higher depending on observed performance.
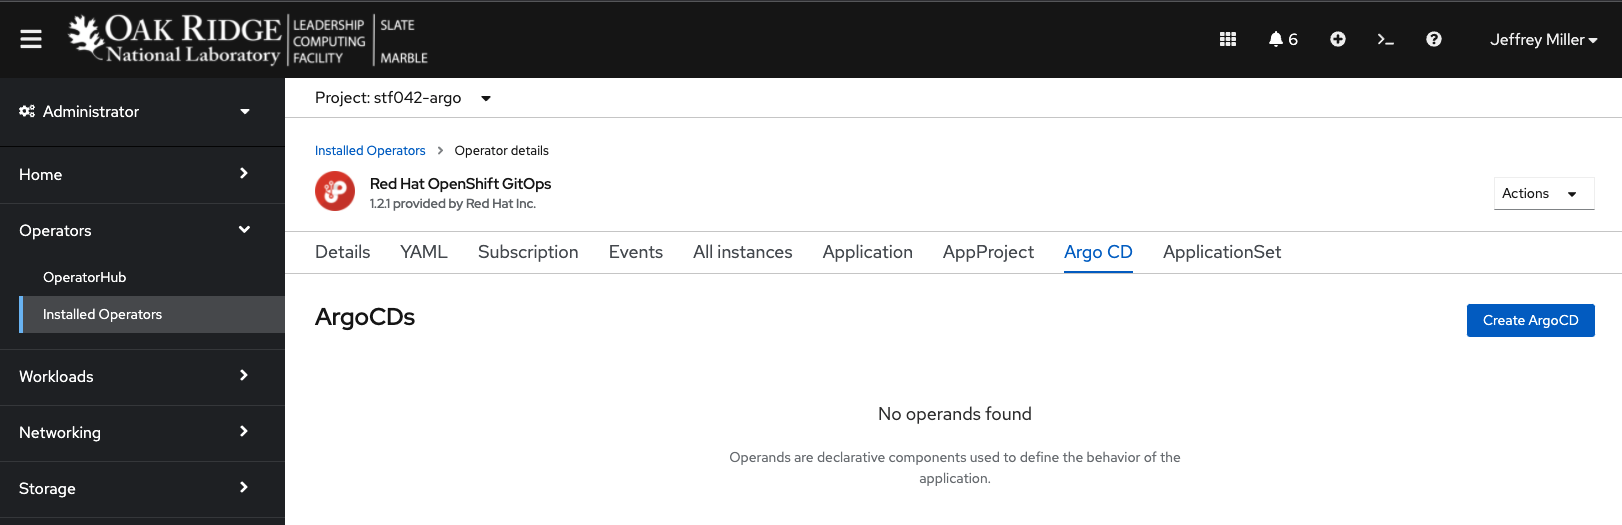
Once a project is identified for deployment of ArgoCD, navigate to the project using the Administrator view of the console, Select Operators -> Installed Operators -> Red Hat OpenShift GitOps -> “Argo CD” tab
Warning
If the project already has an ArgoCD instance, do not install another into the same project.
Next Click the “Create ArgoCD” button. You will be presented with a form view similar to:
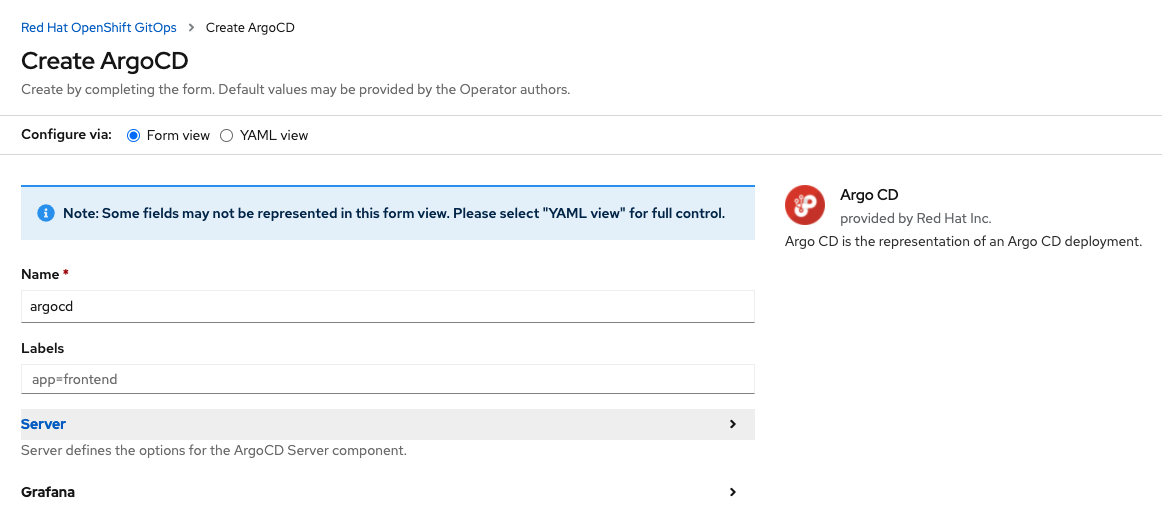
Starting with the form view of the process, make the following changes allowing for access to the ArgoCD web UI via a route:
Server -> Insecure -> true
Server -> Route -> Enabled -> true
Server -> Route -> Tls -> Termination -> edge
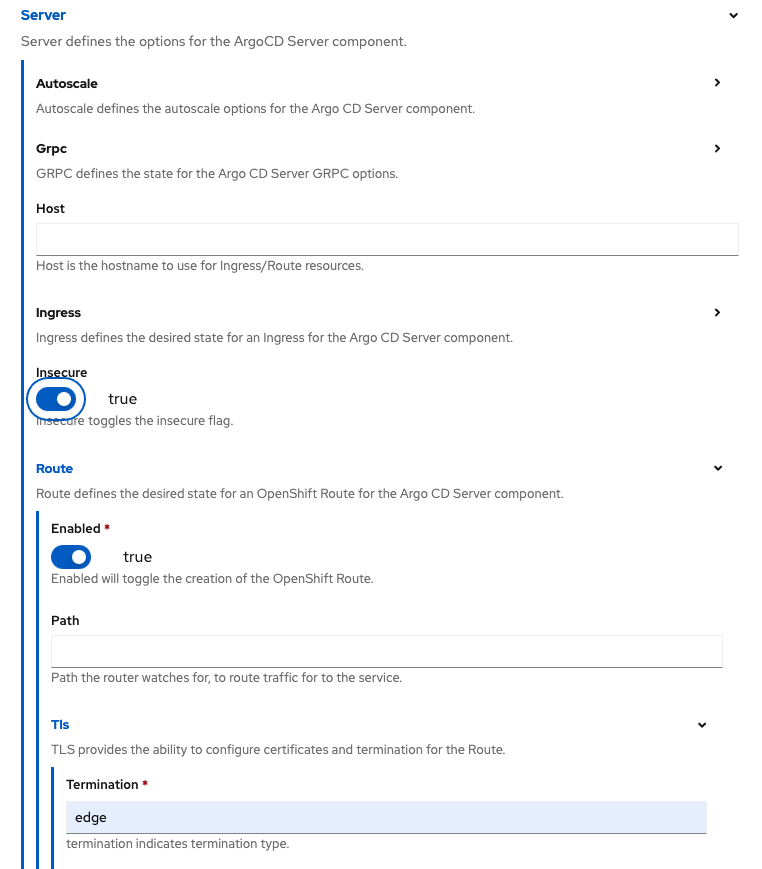
This enables access to the ArgoCD instance once deployed via the web browser more easily. In the above images, notice that the
instance name is argocd. By default, the route name to the web UI will be <<instanceName>>-server-<<projectName>>.apps.<<clusterName>>.ccs.ornl.gov.
If a different host name is desired to access the instance, enter the desired name in the Host parameter while
maintaining the pattern new-name.apps.<cluster>.ccs.ornl.gov. For example,

Once these changes are made, changing over to the YAML view will expose some other parameters set for the ArgoCD instance, such as resource requests for each component:
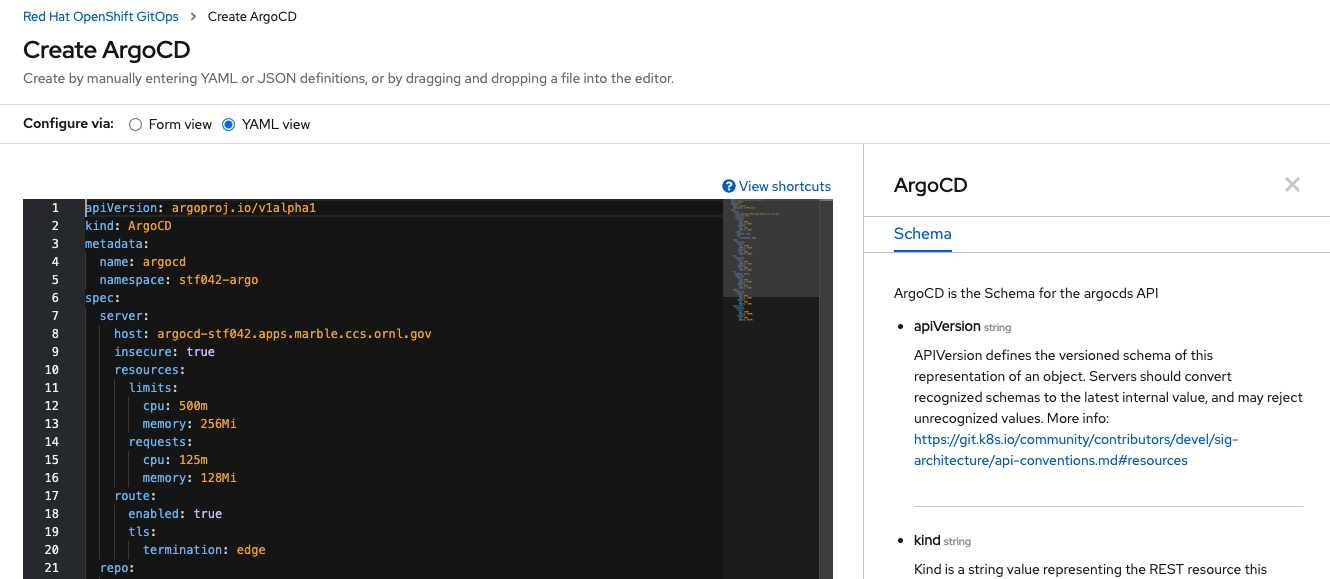
All of the prior mentioned settings should be visible in the spec.server parameters block. In addition to the server component
of ArgoCD, there are other components:
Component |
Description |
|---|---|
server |
provides the web UI as well as an API |
repo |
provides a repository server that caches the git repository and generates Kubernetes manifests |
dex |
provides a Dex OATH instance which is not deployed on OpenShift by default |
ha |
deploys ArgoCD in an HA configuration including an HA Redis instance |
redis |
provides a cache for the other components |
controller |
Kubernetes controller that continuously monitors applications, compares their state to the manifests generated from the repository, and takes corrective to add/change/remove application resources |
The initial resources set by OpenShift GitOps should be sufficient to start working with ArgoCD. If needed, these may be increased should performance issues occur. On the right hand side is the schema for the ArgoCD custom resource listing all of the available parameters that could be used. At this point, no other parameters are needed to create an instance. However, if there are questions over a parameter or capability, please contact the Platforms Group.
When ready to deploy, click the Create button in the lower left. The view returns back to the Argo CD tab, and the Status will
be listed as Phase: Pending:
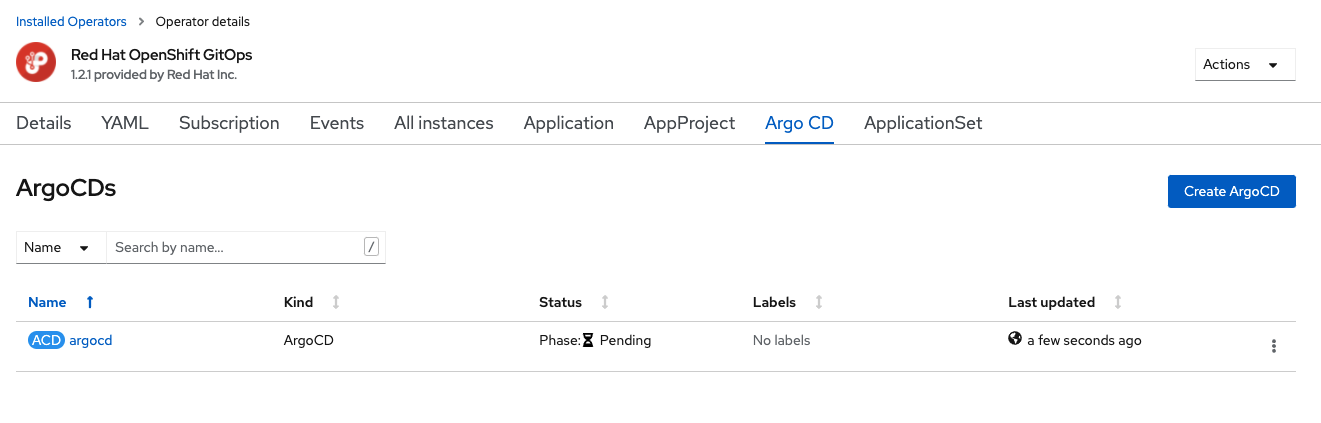
The OpenShift GitOps operator is working in the background to deploy multiple custom resources. Once complete, the
status will change to Phase: Available. The oc get all command will reveal the resources deployed:
$ oc get all
NAME                                      READY   STATUS    RESTARTS   AGE
pod/argocd-application-controller-0       1/1     Running   0          2m52s
pod/argocd-redis-6b9cd5d47-7dpwh          1/1     Running   0          2m52s
pod/argocd-repo-server-5c4dbb5556-sm2bt   1/1     Running   0          2m52s
pod/argocd-server-5bc4646756-2zkr5        1/1     Running   0          2m52s

NAME                            TYPE        CLUSTER-IP       EXTERNAL-IP   PORT(S)             AGE
service/argocd-metrics          ClusterIP   172.25.155.151   <none>        8082/TCP            2m52s
service/argocd-redis            ClusterIP   172.25.178.123   <none>        6379/TCP            2m52s
service/argocd-repo-server      ClusterIP   172.25.220.108   <none>        8081/TCP,8084/TCP   2m52s
service/argocd-server           ClusterIP   172.25.254.6     <none>        80/TCP,443/TCP      2m52s
service/argocd-server-metrics   ClusterIP   172.25.239.4     <none>        8083/TCP            2m52s

NAME                                 READY   UP-TO-DATE   AVAILABLE   AGE
deployment.apps/argocd-redis         1/1     1            1           2m52s
deployment.apps/argocd-repo-server   1/1     1            1           2m52s
deployment.apps/argocd-server        1/1     1            1           2m52s

NAME                                            DESIRED   CURRENT   READY   AGE
replicaset.apps/argocd-redis-6b9cd5d47          1         1         1       2m52s
replicaset.apps/argocd-repo-server-5c4dbb5556   1         1         1       2m52s
replicaset.apps/argocd-server-5bc4646756        1         1         1       2m52s

NAME                                             READY   AGE
statefulset.apps/argocd-application-controller   1/1     2m52s

NAME                                     HOST/PORT                                PATH   SERVICES        PORT   TERMINATION   WILDCARD
route.route.openshift.io/argocd-server   argocd-stf042.apps.marble.ccs.ornl.gov          argocd-server   http   edge          None
When one navigates to the route in a web browser, the ArgoCD login screen will be presented:
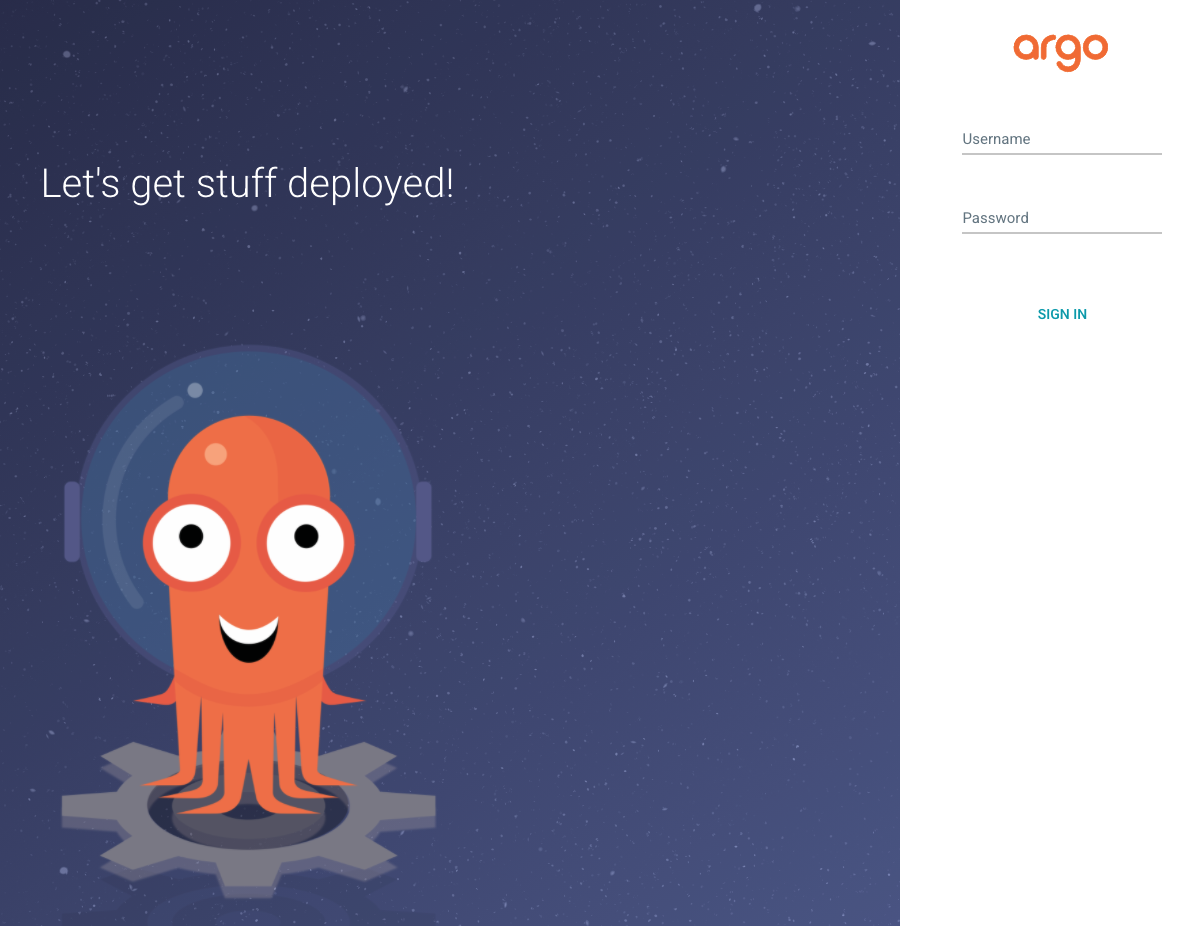
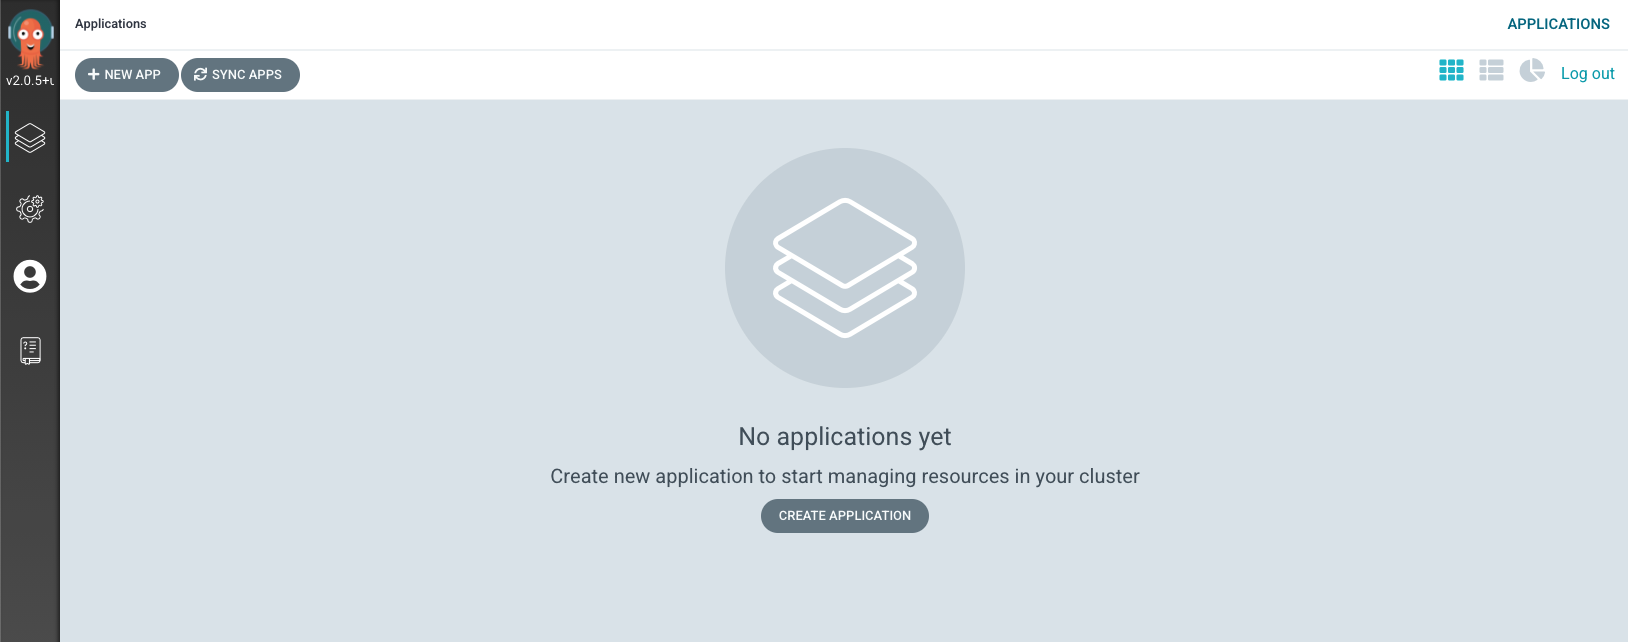
For ArgoCD authentication, the default user is admin with the password stored in the <<instanceName>>-cluster secret in the
project. Following login, the instance is ready for configuration:
Configuration
Prior to using ArgoCD, a git repository containing Kubernetes custom resources needs to be added for use.
Note
The git repository containing Kubernetes custom resources is typically not the same git repository used to build the application.
There are three ways for ArgoCD to connect to a git repository:
connect using ssh
connect using https
connect using GitHub App
Each of these methods are described in the ArgoCD Private Repositories document. For example, to connect to an OLCF or NCCS GitLab instance, create a deploy token per the GitLab documentation for use by ArgoCD copying the username and token value. Then, in ArgoCD, navigate to “Manage your repositories, projects, settings” tab and select “Repositories”.

Once into the “Repositories” area, select “CONNECT REPO USING HTTPS”:
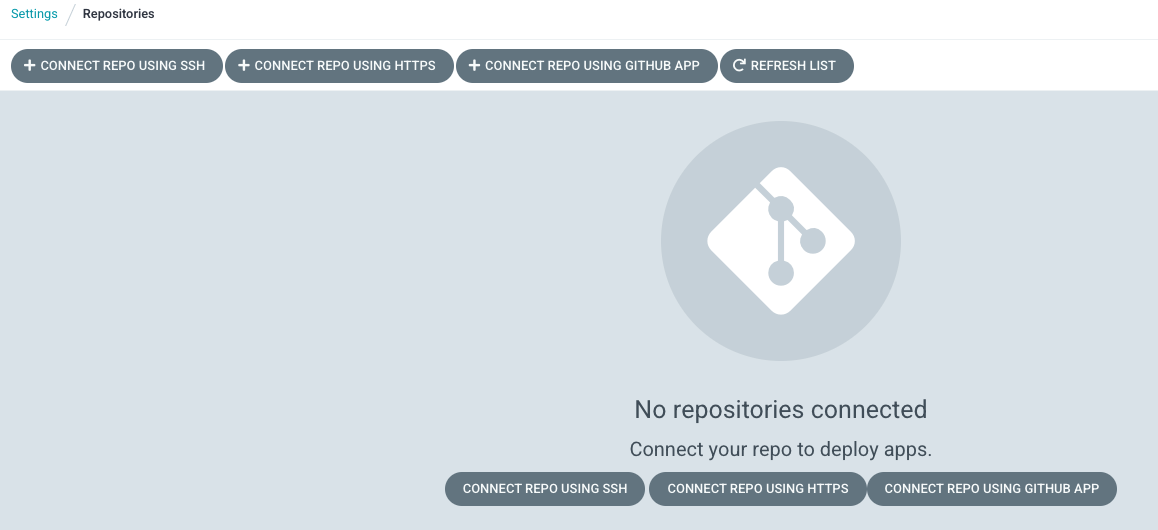
and then add the “Repository URL”, “Username” for the deploy token, and the deploy token itself as the password. If Git-LFS support is needed, click the “Enable LFS support” at the bottom of the page. Once entries look correct:
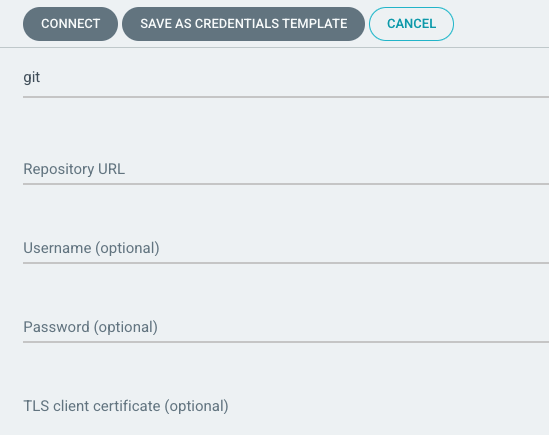
click the “CONNECT” button in the upper left. Once entered and ArgoCD is able to access the server, the connection should have a status of “Successful” with a green check mark:

At this point, it should now be possible to use this git repository for deployment of resources into a project.
Multiple Project Management
By default, OpenShift GitOps will automatically configure the project and add the necessary roles to allow for the deployment of Kubernetes resources to the same project that contains the ArgoCD deployment. If it is desired to manage resources in a project other than where ArgoCD is deployed, please contact the Platforms Group for assistance in configuring the additional projects.
Application Deployment
ArgoCD supports multiple methods to deploy Kubernetes resource manifests:
directory of YAML or JSON files
kustomizeapplicationshelm charts
This section will focus on the deployment of Kubernetes resources using kustomize. If the use of helm is
preferred, refer to the
Continuous Delivery with Helm and ArgoCD
blog post as well as the App of Apps Pattern discussed on the
ArgoCD Cluster Bootstrapping
page.
Note
References to ksonnet for deployment of Kubernetes resources may be mentioned in some documentation. However, the use if ksonnet is no longer supported by ArgoCD.
In order to deploy resources, one should have the following to start with:
base directory of YAML files that specify one or multiple kubernetes resources
kustomization.yamlfileone or more overlay directories
Unlike helm, which is a template framework for deployment of kubernetes resources, kustomize is a patching framework. Once the base
directory of YAML files is in place, kustomize patches those files to modify kubernetes resources for deployment with custom
configurations for one or multiple environments such as dev, test, and prod.
Directory Structure
Before going into how ArgoCD will use a kustomize configuration setup, a word about organizing the code repository. Prior to starting
work with kustomize, take some time to consider what makes sense for setting up the directory of repository. Looking at the GitHub
repository for kustomize, there is a
kustomize Hello World
document illustrating the basic layout to start with:
├── base
│   ├── configMap.yaml
│   ├── deployment.yaml
│   ├── kustomization.yaml
│   └── service.yaml
└── overlays
    ├── production
    │   ├── deployment.yaml
    │   └── kustomization.yaml
    └── staging
        ├── kustomization.yaml
        └── map.yaml
As seen above, in the simplest form a git repository contains two directories at the root: base and overlays. The
base directory contains a set resources which deploy the application. These could be YAML files generated from the output of existing
OpenShift project resources, new YAML files for resources that have not been deployed prior, YAML files generated by the helm template
command, or even an existing git repository of YAML files located in GitHub or GitLab maintained by someone else. The overlays directory
was added to contain patches for distinct deployments. In this case, two deployments (production and staging), often referred to as
environments, have been specified. The production environment has a patch file for the deployment.yaml resource file and the
staging environment contains the map.yaml resource file, which is a patch file for configMap.yaml.
Note
If using a remote repository as a base set of resources, make sure to pin the version at a specific tag or hash to prevent unexpected changes in your project should upstream change.
For more advanced use cases, Gerald Nunn provides a helpful directory layout in his
gnunn-gitops repository which considers not only kustomize
code organization but also resources for bootstrapping ArgoCD instances, TekTon pipeline resources, Jenkins pipeline resources,
application management on multiple clusters, and applications that consist of multiple component applications. Pieces represented
here could be incorporated into the above initial directory structure as makes sense for how the group operates.
Other potential information of use:
kustomization.yaml
The kustomization.yaml file declares what resource files kustomize should use when generating kubernetes resources. Additionally,
the kustomization.yaml file will specify how resources should be modified, if needed. A kustomization.yaml file will contain
information that falls typically into four categories:
resources: what existing resource files should be used.
generators: what new resources should be created dynamically.
transformers: what resources should be changed and how to change them.
meta: fields that may influence all of the above.
Starting with the Hello World example in the prior section, the kustomization.yaml file located in the base directory would look
similar to:
apiVersion: kustomize.config.k8s.io/v1beta1
kind: Kustomization
metadata:
  name: arbitrary
commonLabels:
  app: hello
resources:
- deployment.yaml
- service.yaml
- configMap.yaml
The structure of the kustomization.yaml file starts off similar to the structure of a kubernetes object: apiVersion, kind, and
metadata.name. From there, the file contains resource information and meta information. The resource information is
specified in the resources block and lists files that should be included for use by kustomize. In this case, three
files are specified: deployment.yaml, service.yaml, and configMap.yaml. Each of these files define a kubernetes resource
of the type indicated by the filename. Resource file names are arbitrary, but they must match the name of the file in the directory. Files
that exist in a directory but are not included as resources, consumed by generators, or applied by transformers are ignored.
The meta information in the kustomization.yaml illustrates what is referred to as a cross-cutting field. In this case, the
commonLabels block adds a label app: hello which will be included in all of the resources specified in the resource files.
Cross-cutting fields could also be used to set the namespace (namespace) for the resources to be created in, add a prefix (namePrefix)
or suffix (nameSuffix) to all resource names, or add a set of annotations (commonAnnotations).
To see the results of the commonLabels field, the kustomize build command will display the output for inspection:
$ kustomize build base/
apiVersion: v1
data:
  altGreeting: Good Morning!
  enableRisky: "false"
kind: ConfigMap
metadata:
  labels:
    app: hello
  name: the-map
---
apiVersion: v1
kind: Service
metadata:
  labels:
    app: hello
  name: the-service
spec:
  ports:
  - port: 8666
    protocol: TCP
    targetPort: 8080
  selector:
    app: hello
    deployment: hello
  type: LoadBalancer
---
apiVersion: apps/v1
kind: Deployment
metadata:
  labels:
    app: hello
  name: the-deployment
spec:
  replicas: 3
  selector:
    matchLabels:
      app: hello
      deployment: hello
  template:
    metadata:
      labels:
        app: hello
        deployment: hello
    spec:
      containers:
      - command:
        - /hello
        - --port=8080
        - --enableRiskyFeature=$(ENABLE_RISKY)
        env:
        - name: ALT_GREETING
          valueFrom:
            configMapKeyRef:
              key: altGreeting
              name: the-map
        - name: ENABLE_RISKY
          valueFrom:
            configMapKeyRef:
              key: enableRisky
              name: the-map
        image: monopole/hello:1
        name: the-container
        ports:
        - containerPort: 8080
The app label now appears in each of the generated resources- configMap, Deployment, and service. Looking at the
`kustomization.yaml file for the staging environement:
$ cat overlays/staging/kustomization.yaml
apiVersion: kustomize.config.k8s.io/v1beta1
kind: Kustomization
metadata:
  name: staging-arbitrary
namePrefix: staging-
commonLabels:
  variant: staging
  org: acmeCorporation
commonAnnotations:
  note: Hello, I am staging!
resources:
- ../../base
patchesStrategicMerge:
- map.yaml
there are a few meta information blocks present: namePrefix, commonLabels, and commonAnnotations. Additionally, we
see that there is a patch specified with the patchesStrategicMerge block where a patch file to be merged is specified:
$ cat overlays/staging/map.yaml
apiVersion: v1
kind: ConfigMap
metadata:
  name: the-map
data:
  altGreeting: "Have a pineapple!"
  enableRisky: "true"
In this case, the patch will use a merge strategy to change the data entries for the specified apiVersion/kind/metadata.name object.
Running kustomize build on the staging environment shows the result of the patch as well as the added meta:
$ kustomize build overlays/staging
apiVersion: v1
data:
  altGreeting: Have a pineapple!
  enableRisky: "true"
kind: ConfigMap
metadata:
  annotations:
    note: Hello, I am staging!
  labels:
    app: hello
    org: acmeCorporation
    variant: staging
  name: staging-the-map
---
apiVersion: v1
kind: Service
...
when compared to the output from the build command ran against the base directory.
Note
The apiVersion/kind/metadata.name must match exactly the object to modify. If the patch does not match an object, an error similar to: Error: no matches for Id ~G_v1_ConfigMap|~X|themap; failed to find unique target for patch ~G_v1_ConfigMap|themap will be generated will instead pointing to the problem. In the case, the metadata.name field was themap instead of the-map.
If more advanced patching is needed of a resources or field does not support the strategic merge process, use patchesJson6902 instead
of patchesStrategicMerge as this provides for more operations and control over the merge process. Additionally, one may also be
able to use a configuration transformation to
modify the resulting resources. While not utilized the the helloWorld kustomize application, these are illustrated in some of the
other examples it the same repository.
Review of the production environment is left as an exercise for the reader.
ArgoCD and kustomize
With a git repository defined in the ArgoCD Repositories settings that has kustomize environments ready for use, one can start using
ArgoCD to deploy and manage kubernetes resources.
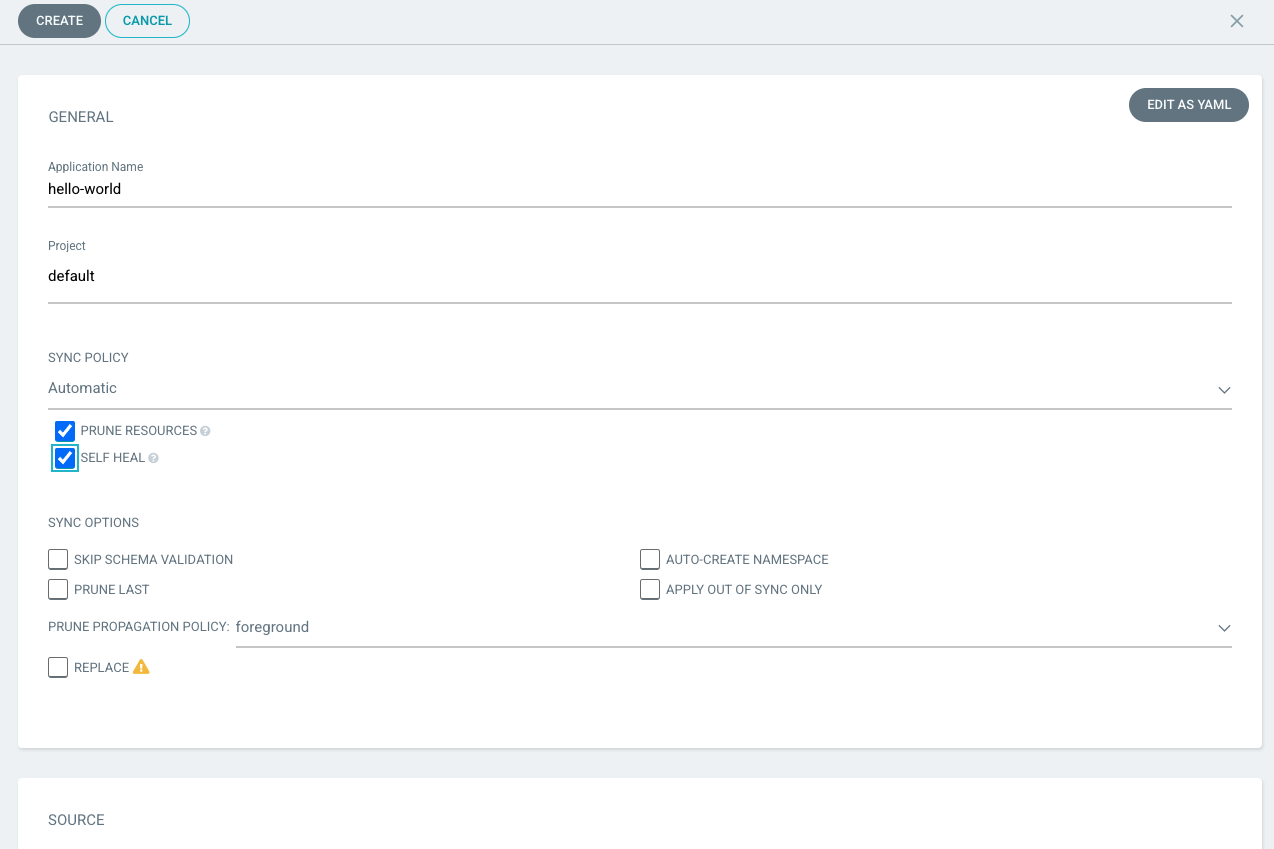
From the ArgoCD Applications screen, click the Create Application button. In the General application settings, give the
application deployment a name for ArgoCD to refer to in the display.
For Project, usually the ArgoCD default project created during the ArgoCD instance installation is
sufficient. However, your workload may benefit from a different logical grouping by using multiple
ArgoCD projects. If it is
desired to have ArgoCD automatically deploy resources to an OpenShift namespace, change the Sync Policy to Automatic. Check the
Prune Resources to automatically remove objects when they are removed from the repository and Self Heal to automatically restore
configuration of objects when their configuration gets out of sync with the specified files in the git repository.
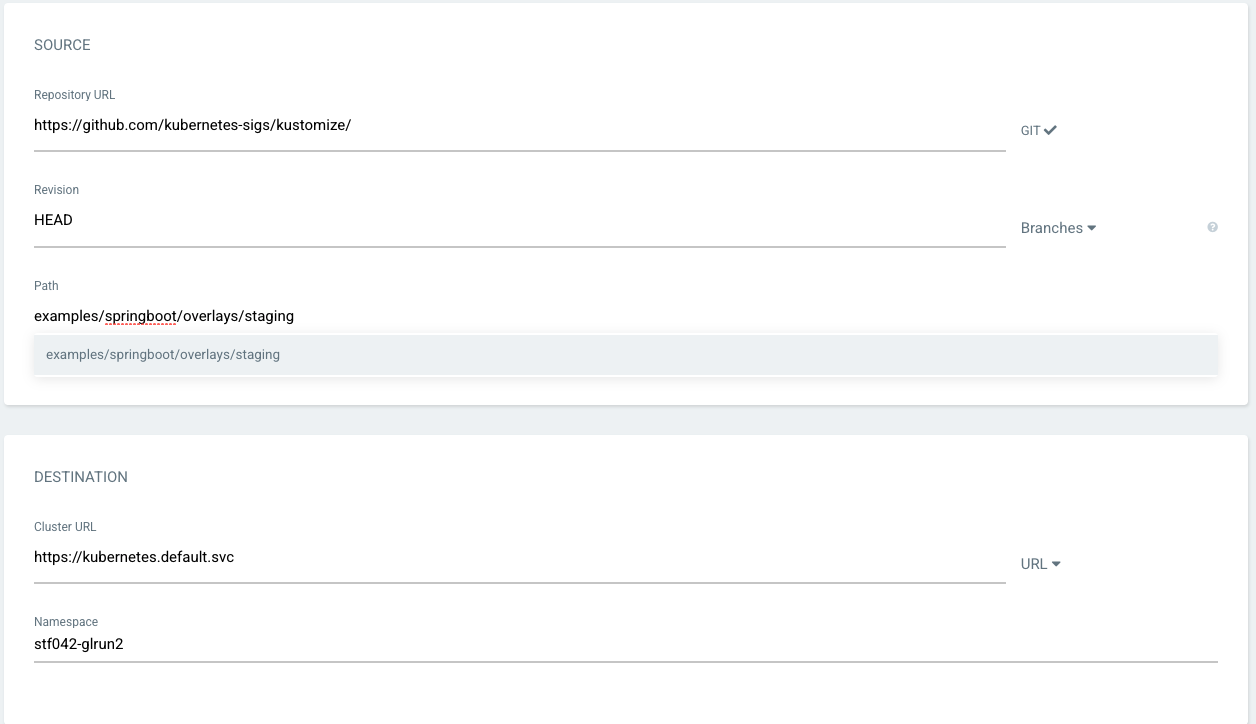
Next, specify the application source and destination settings. The source settings specify the git repository, revision, and directory
path for ArgoCD to use for resource deployment. ArgoCD likely automatically detected the possible kustomize environment choices in
the repository when clicking in the Path entry. If so, select the appropriate environment. If not, enter the path to the directory
within the git repository to use. The destination settings refer to where ArgoCD will deploy resources. The Cluster URL refers to
which kubernetes cluster to deploy. This will likely be https://kubernetes.default.svc- the same cluster the ArgoCD instance is
installed. The Namespace setting should be the OpenShift namespace that ArgoCD will deploy resources. This may or may not be the
same namespace that ArgoCD is installed (see prior discussion on multiple namespace management in this document).
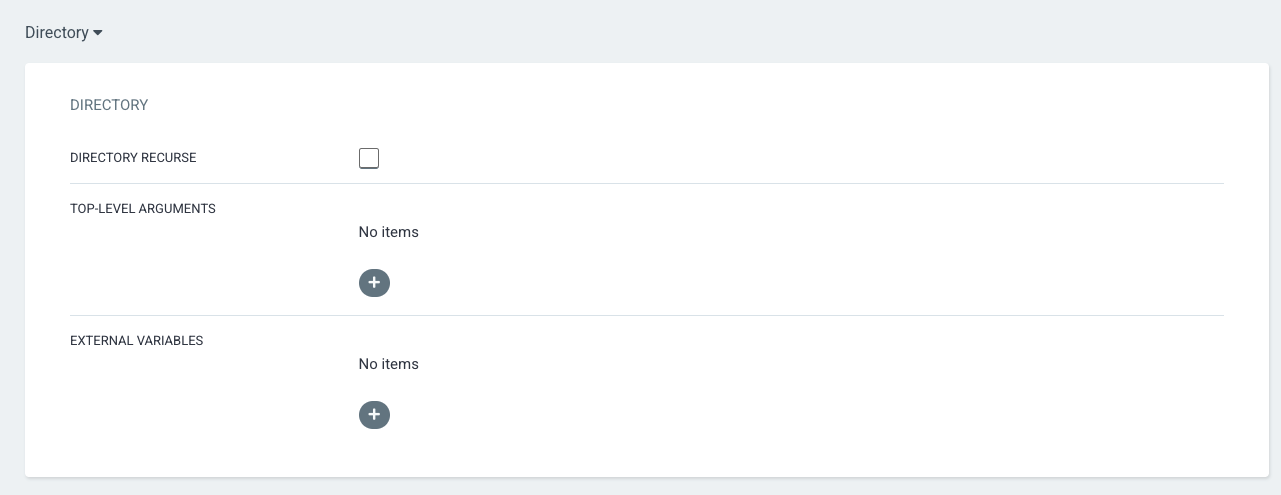
The last section entitled Directory most likely will be left at the defaults.
Once everything is set, scroll to the top and click the Create button. An application tile should be created on the ArgoCD
Applications page:
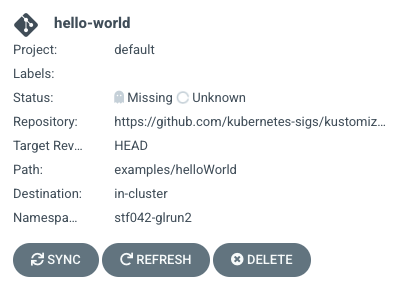
Clicking on the tile in this case revealed that there was an error on deployment:

The Namespace XXXX for XXXX is not managed. indicates that the namespace has not yet been setup for ArgoCD to deploy resources. Please
contact the Platforms Group for assistance in changing the configuration of the OpenShift namespace.
In this case, the namespace to deploy resources to was incorrect. The application was editted to change the namespace to deploy resources, and the application tile was reviewed:
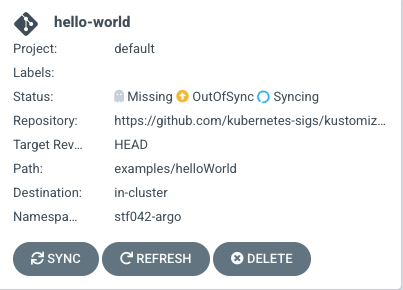
ArgoCD has successfully accessed the namespace, realized that the state of the resources in the namespace are OutOfSync with the resource
requirements of the code repository, and started the Syncing process to create and/or modify resources in the namespace to match the
desired configuration. Clicking on the application tile will reveal more detailed information on the process:
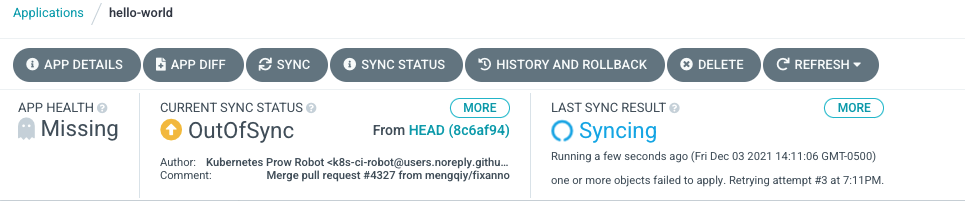
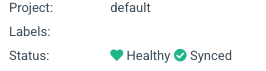
When the ArgoCD has completed the sync process, the application tile will indicate a green check mark next to Synced indicating that the
process completed and a green heart next to Healthy indicating that all resources are properly configured.