Vampir
Overview
Performance optimization is a critical task in efficient high-performance computing (HPC), since the cost of bottlenecks increases with growing system size. Vampir is a software performance visualizer focused on highly-parallel applications. It presents a unified view on an application run including the use of programming paradigms like MPI, SHMEM, OpenMP, PThreads, HIP, CUDA, OpenCL and OpenACC. Vampir can also incorporate file I/O, hardware performance counters and other performance data sources. Various interactive displays offer detailed insight into the performance behavior of the analyzed application. Vampir’s scalable analysis server and visualization engine enable interactive navigation of large amounts of performance data.
Vampir uses the OTF2 (Open Trace Format 2) as its trace file format. Score-P and TAU are two instrumentation and runtime-measurement tools that can generate OTF2 trace files for Vampir to visualize. These profiling tools support various instrumentation options including source level and instrumentation as well as compile/link time instrumentation, and OLCF documentation on Profiling Tools is available at https://docs.olcf.ornl.gov/software/profiling/ .
See https://vampir.eu/ for details about Vampir.
The instructions below outline how to access and display the Vampir GUI for OLCF systems, but do not cover detailed usage of Vampir itself. Please refer to the Vampir documentation and tutorials for more information on how to use the various features of Vampir: https://vampir.eu/tutorial .
Usage
Vampir can be accessed in a few different ways depending on a couple of factors:
If you have a large trace file, it could benefit from processing the trace using VampirServer on the batch system’s compute nodes while displaying on a Vampir GUI running at the user’s terminal.
If the trace file is small enough (< ~1 GB), it can be viewed on a login node without issues.
VampirServer is the backend software component that can run across multiple compute nodes taking advantage of the memory and compute resources of these nodes. This provides an increase in performance for viewing large trace files i.e. greater than 1GB. Note: VampirServer does not utilize GPU acceleration.
The following sections will cover the 3 different methods for using Vampir.
For each method, you will need to enable X11 forwarding
on an OLCF machine to allow a GUI to be launched to a remote screen.
To do so, you can use the ssh -X (using option ‘-X ‘) as shown below
$ ssh -X <userid>@<machine>.olcf.ornl.gov
# On Frontier: ssh -X <userid>@frontier.olcf.ornl.gov
Please visit this link if you need more information for different ORNL Systems
Vampir on a Login Node
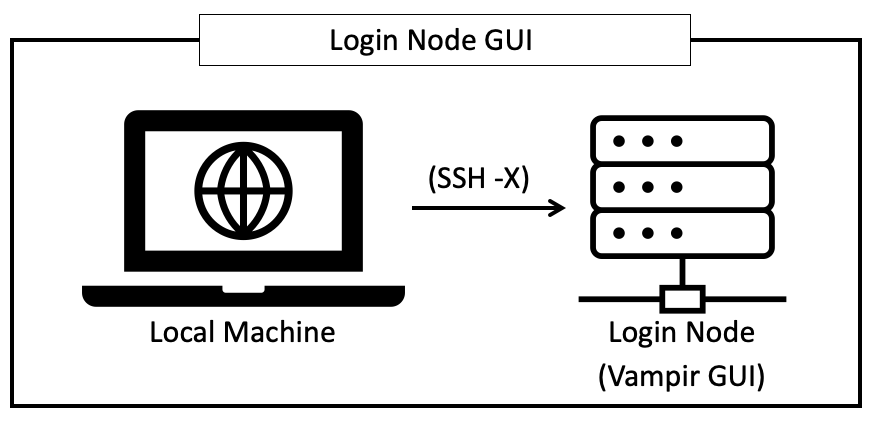
Note
Here the Vampir trace analysis and GUI run directly on a login node. Do not use a login node to run Vampir for trace files > 1 GB! Please see the next 2 sections for running larger trace files.
Login to the OLCF machine with X11 forwarding, and execute the commands below to load the Vampir module and launch the GUI.
$ ssh -X <userid>@<machine>.olcf.ornl.gov
...
<machine>$ module load vampir
<machine>$ vampir &
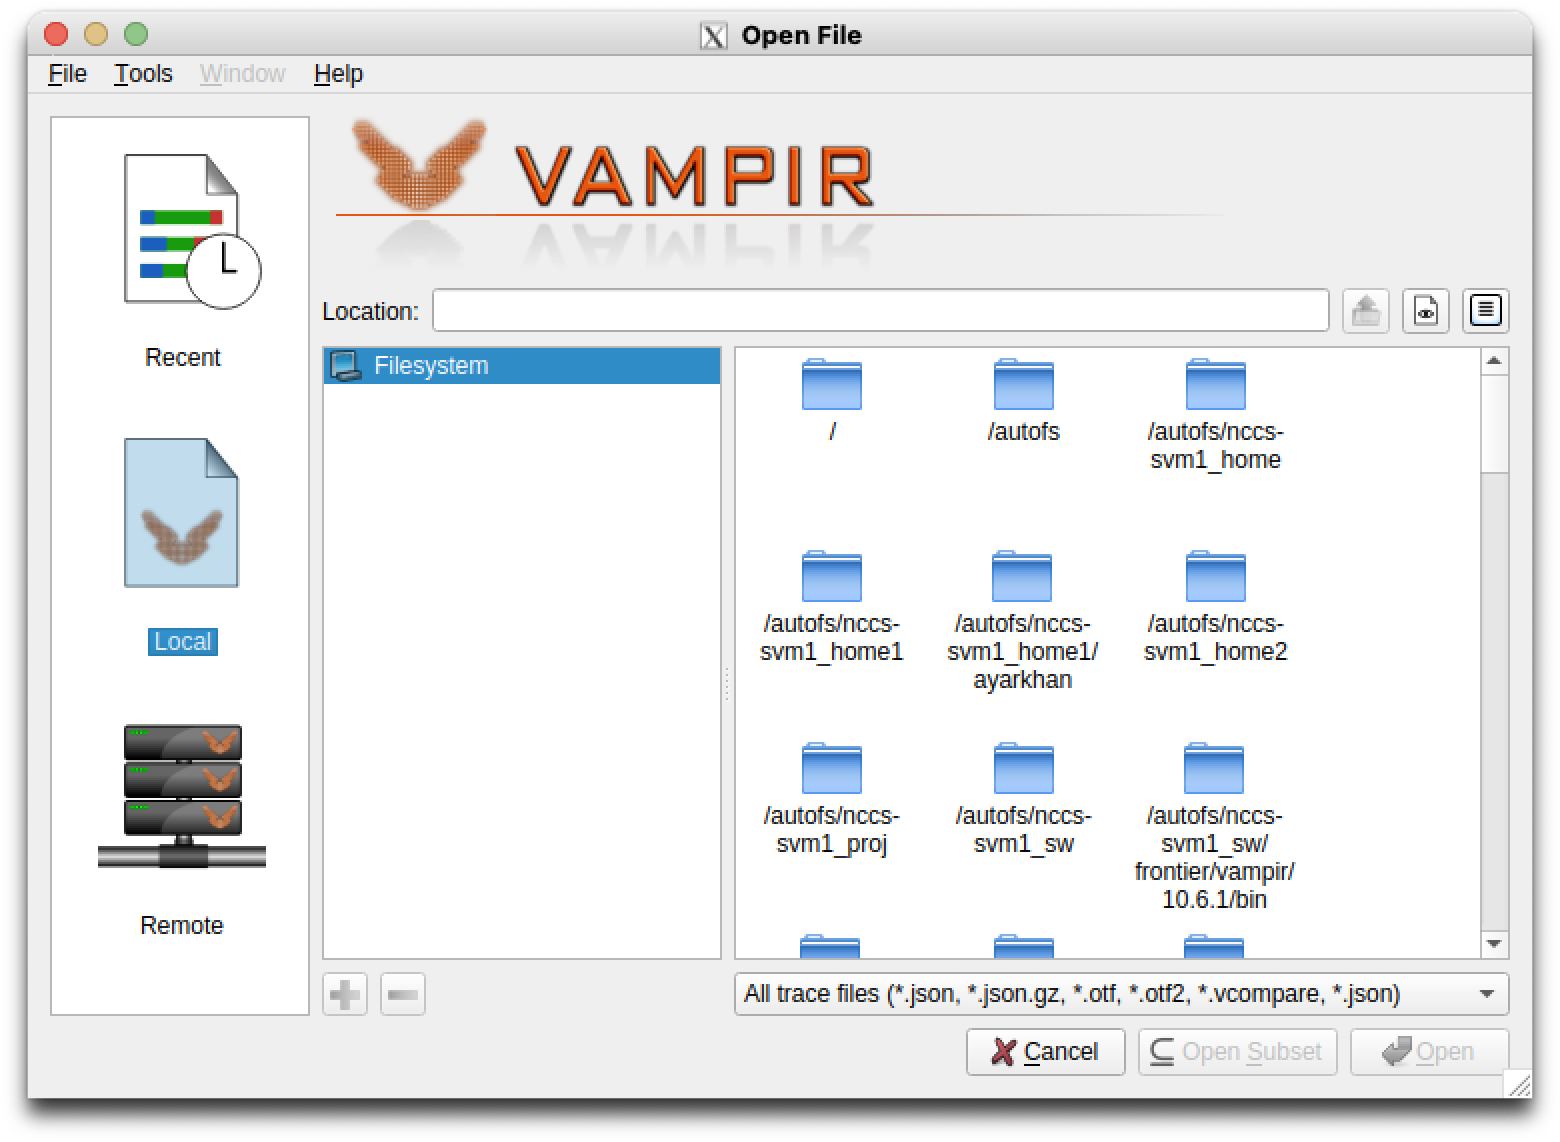
Once the GUI pops up (might take a few seconds), you can load a file resident on
the file system by selecting Local File for file selection.
Running the Vampir GUI via X11 forwarding can be very slow, depending on your network connection. If that is the case, consider using the Vampir Tunneling from Local Machine to VampirServer method outlined below.
Vampir on Login Node Using VampirServer
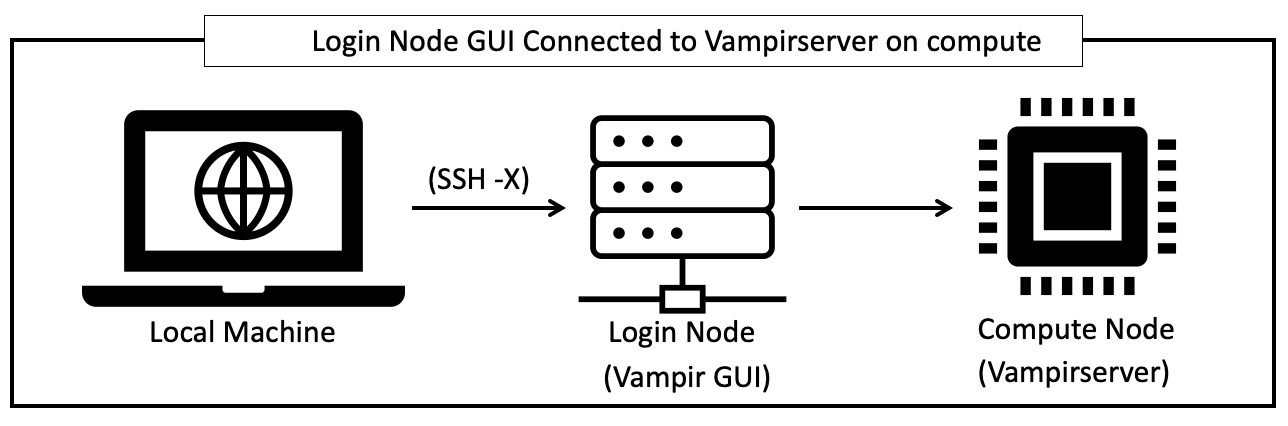
Note
Here the VampirServer process runs on compute nodes to handle the trace file processing, while the Vampir GUI runs on a login node and displays via X11 forwarding. Please use this connection method for trace files larger than (> 1 GB), and see the next section Vampir Tunneling to VampirServer for an even more optimal solution. Attempting to visualize large trace files (> 1 GB) will be very slow over X11 forwarding and can cause decreased performance on the shared login nodes for other users
After connecting to your ORNL System using X11 forwarding you will need to load the Vampir module and start the VampirServer.
$ ssh -X <userid>@<machine>.olcf.ornl.gov
...
$ module load vampir
$ vampirserver start -- -A <account> -t <walltime in HH:MM:SS> -N <num of nodes>
# Example: vampirserver start --  -A ABC123 -t 00:30:00 -N 1
Once your job starts, VampirServer startup messages should appear in terminal window. You will need this information!
[login_node]$ vampirserver start -- -A ABC123 -t 00:30:00 -N 1
Launching VampirServer...
Submitting to slurm a 1 node job with a walltime of 00:30:00...
...
salloc: Nodes frontier01257 are ready for job
VampirServer 10.6.1 Professional (ae193eeb)
Licensed to ORNL
Running 4 analysis processes... (abort with vampirserver stop 19388)
User: <USERID>
Password: <SERVER-PASSWORD>
VampirServer <19388> listens on: frontier01257:30092
If you get a message like “Error: VampirServer startup timeout (300 seconds) has
been reached”, it means that the VampirServer batch job was not able to start
before the default (300 sec) timeout period. You can try increasing the timeout
by adding the option --timeout <seconds> to the vampirserver start
command.
$ vampirserver start --timeout 600 -- -A ABC123 -t 00:30:00 -N 1
Launch the Vampir GUI front end on the login node using X11 forwarding
On the login node (connected to your local machine using X11 forwarding), launch the Vampir GUI on the frontend/login node with the following command:
$ vampir &
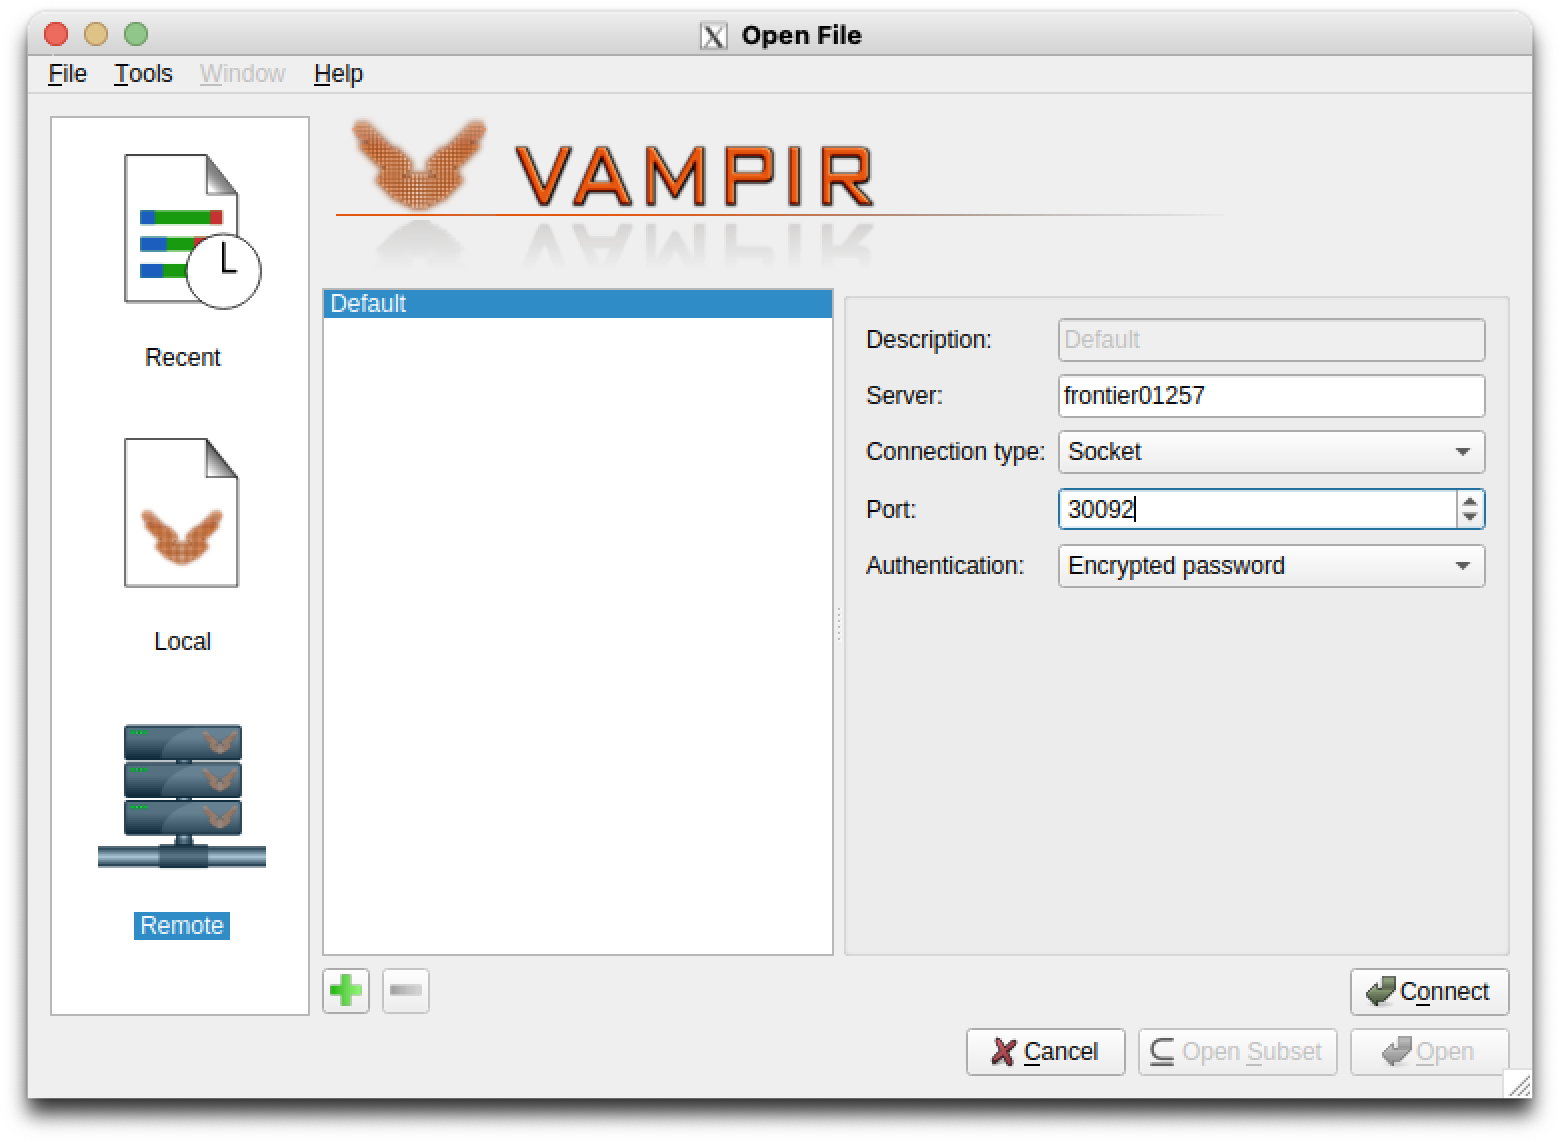
Once the GUI has opened, you will need to connect to the VampirServer using the
Remote File option as shown below. If there is a ‘recent files’ window open, select ‘open other’.
Enter the Server-nodeID and the Port number from the earlier VampirServer
output (“frontier00018:30092” == “Server-nodeID:Port”).
Select Encrypted password from the Authentication dropdown option.
Then press Connect.
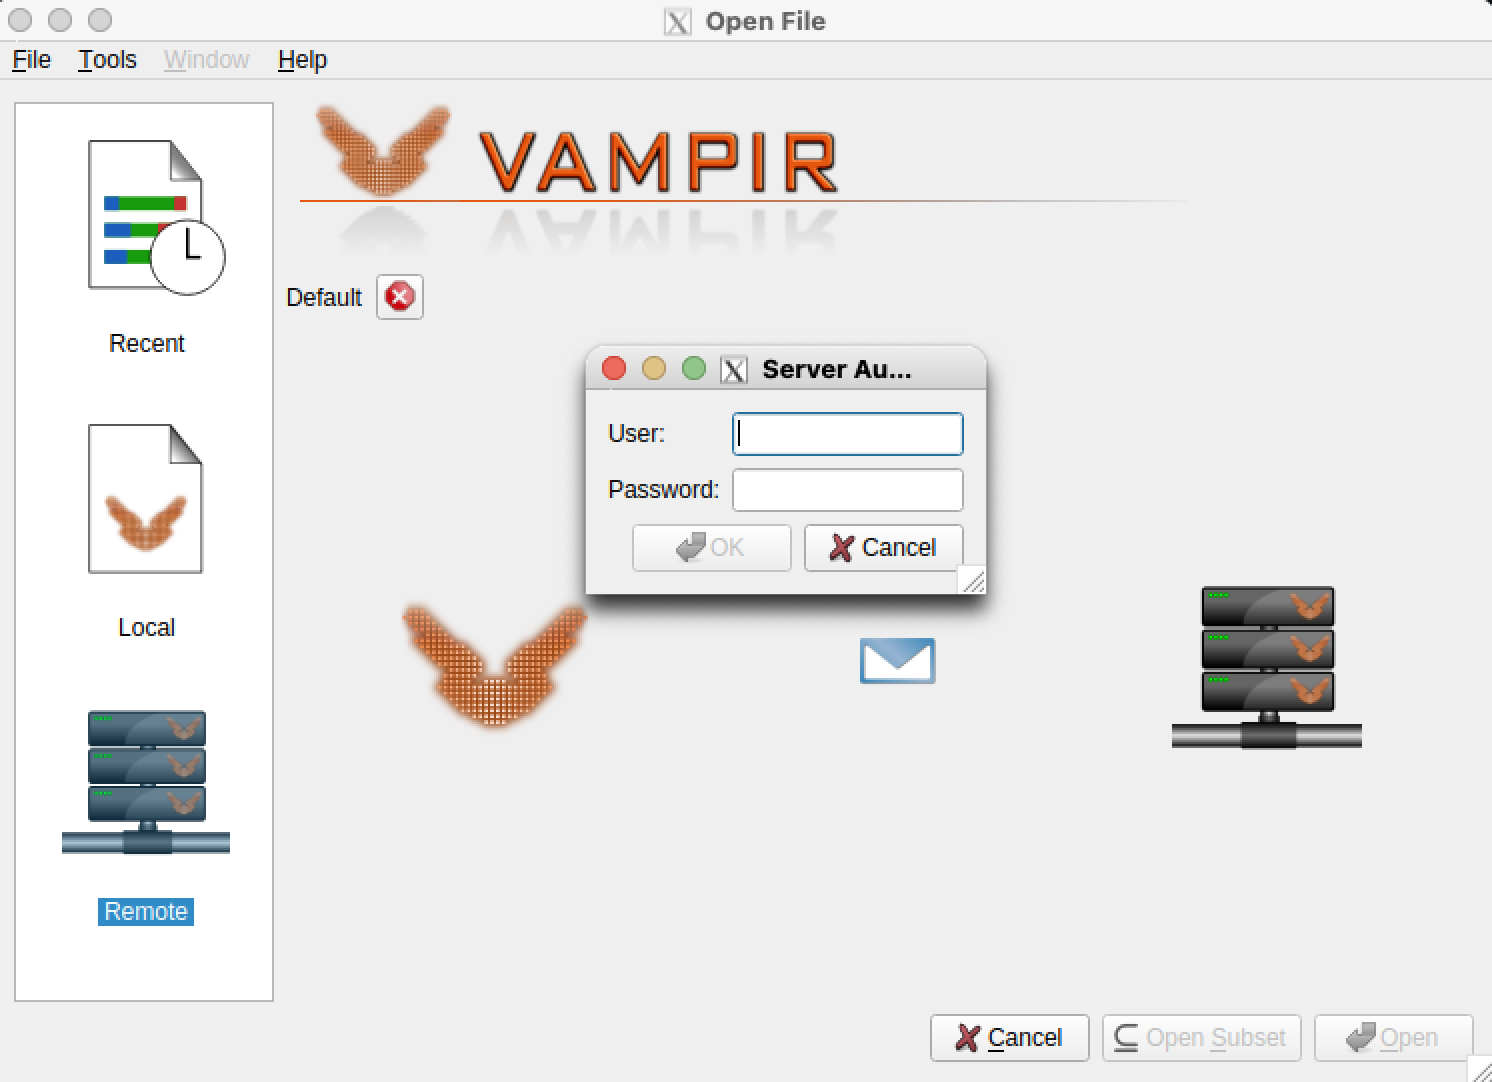
When the server authentication window pops up, you will need to enter the USERID
and the SERVER-PASSWORD that was printed on the VampirServer terminal screen.
Once authenticated, you will be able to navigate through the filesystem to your .otf2 profile files.
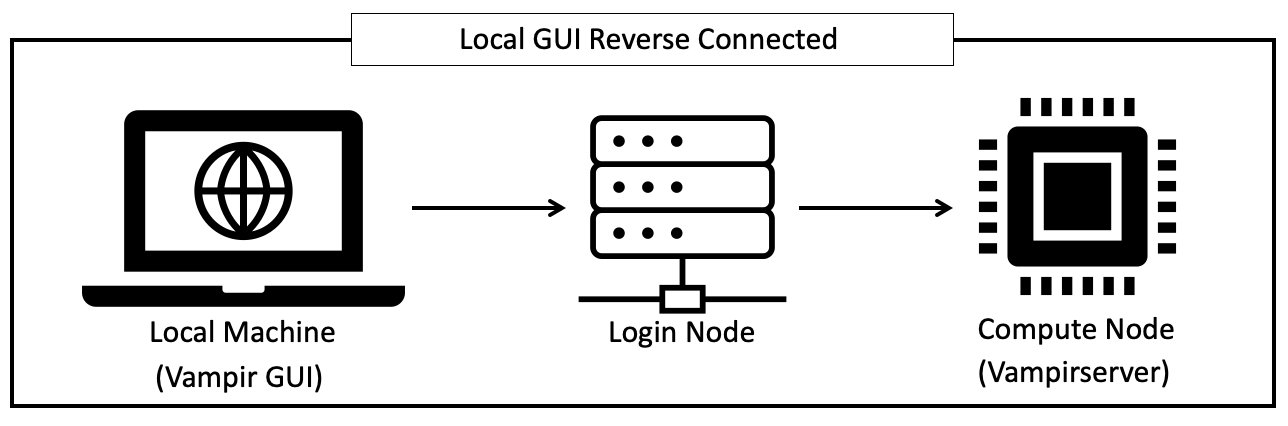
Vampir Tunneling from Local Machine to VampirServer
Note
This method uses a secure tunnel (ssh port forwarding) to connect your local machine’s Vampir GUI to the VampirServer running on the compute nodes. This method can be used for any size trace file, but is especially useful for larger trace files (> 1 GB) since it avoids the performance issues of X11 forwarding.
This method will require you to have a local copy of the Vampir GUI already
installed on your local machine. If you do not have a local copy, please
reach out to the help desk at help@olcf.ornl.gov for instructions on getting
a local copy.
This connection method is more complex than the other 2 methods, however it also can provide a smoother experience for larger trace files. The Vampir GUI client will be on your local machine and the server will be on the compute nodes and you will create a secure (ssh) tunnel between the two.
Similar to the previous methods outlined above, you will start by connecting to your ORNL System using X11 forwarding Once connected you will then need to start the VampirServer.
$ ssh -X <userid>@<machine>.olcf.ornl.gov
...
$ module load vampir
# Start the VampirServer
# Example: vampirserver start --  -A ABC123 -t 60 -N 1
$ vampirserver start -- -A <Account/Project_ID> -t <walltime in HH:MM:SS> -N <num of nodes>
...
salloc: Nodes frontier01257 are ready for job
VampirServer 10.6.1 Professional (ae193eeb)
Licensed to ORNL
Running 4 analysis processes... (abort with vampirserver stop 19388)
User: <USERID>
Password: <SERVER-PASSWORD>
VampirServer <19388> listens on: frontier01257:30092
Once you have successfully authenticated, you will need the information printed on the terminal window. That includes:
User: <USERID>
Password (e.g., <SERVER-PASSWORD>)
NodeID (e.g., frontier01257)
PortNumber (e.g., 30092)
Once the VampirServer is started, in a fresh terminal window on your Local machine you can then initiate the port forward command. This will open a secure tunnel from your local machine to the backend server running VampirServer.
Port Forwarding
# <LocalHostPort> can be any unused port number on your local machine, e.g., 30000
# <NodeID> and <PortNumber> are from the VampirServer output above

[local_machine]$ ssh -L <LocalHostPort>:<NodeID>:<PortNumber>  <USERID>@<SYSTEM>.olcf.ornl.gov

# Example on Frontier: ssh -L 30000:frontier00018:30092 <USERID>@frontier.olcf.ornl.gov
# LocalHostPort is chosen to be 30000.  Vampirserver listens on node frontier00018 at port 30092.
Note
The LocalHostPort can be any unused port number on your local machine…try a number between 30000-30030. To check if the port you picked is available run:
[local_machine] $ netstat -ab | grep "<LocalHostPort>"
# This can take a minute to return anything. If nothing is returned, your selected port is available
After submitting the ssh port forward command as seen above, it will ask for your login information to access the OLCF system. Leave this terminal window open!
Launch the Vampir GUI on your local machine
Similar to how we connected Vampir to the VampirServer in the previous
section, you will follow the same steps except you will use the
Server: localhost and the Port: <LocalHostPort>, the port number you
selected.
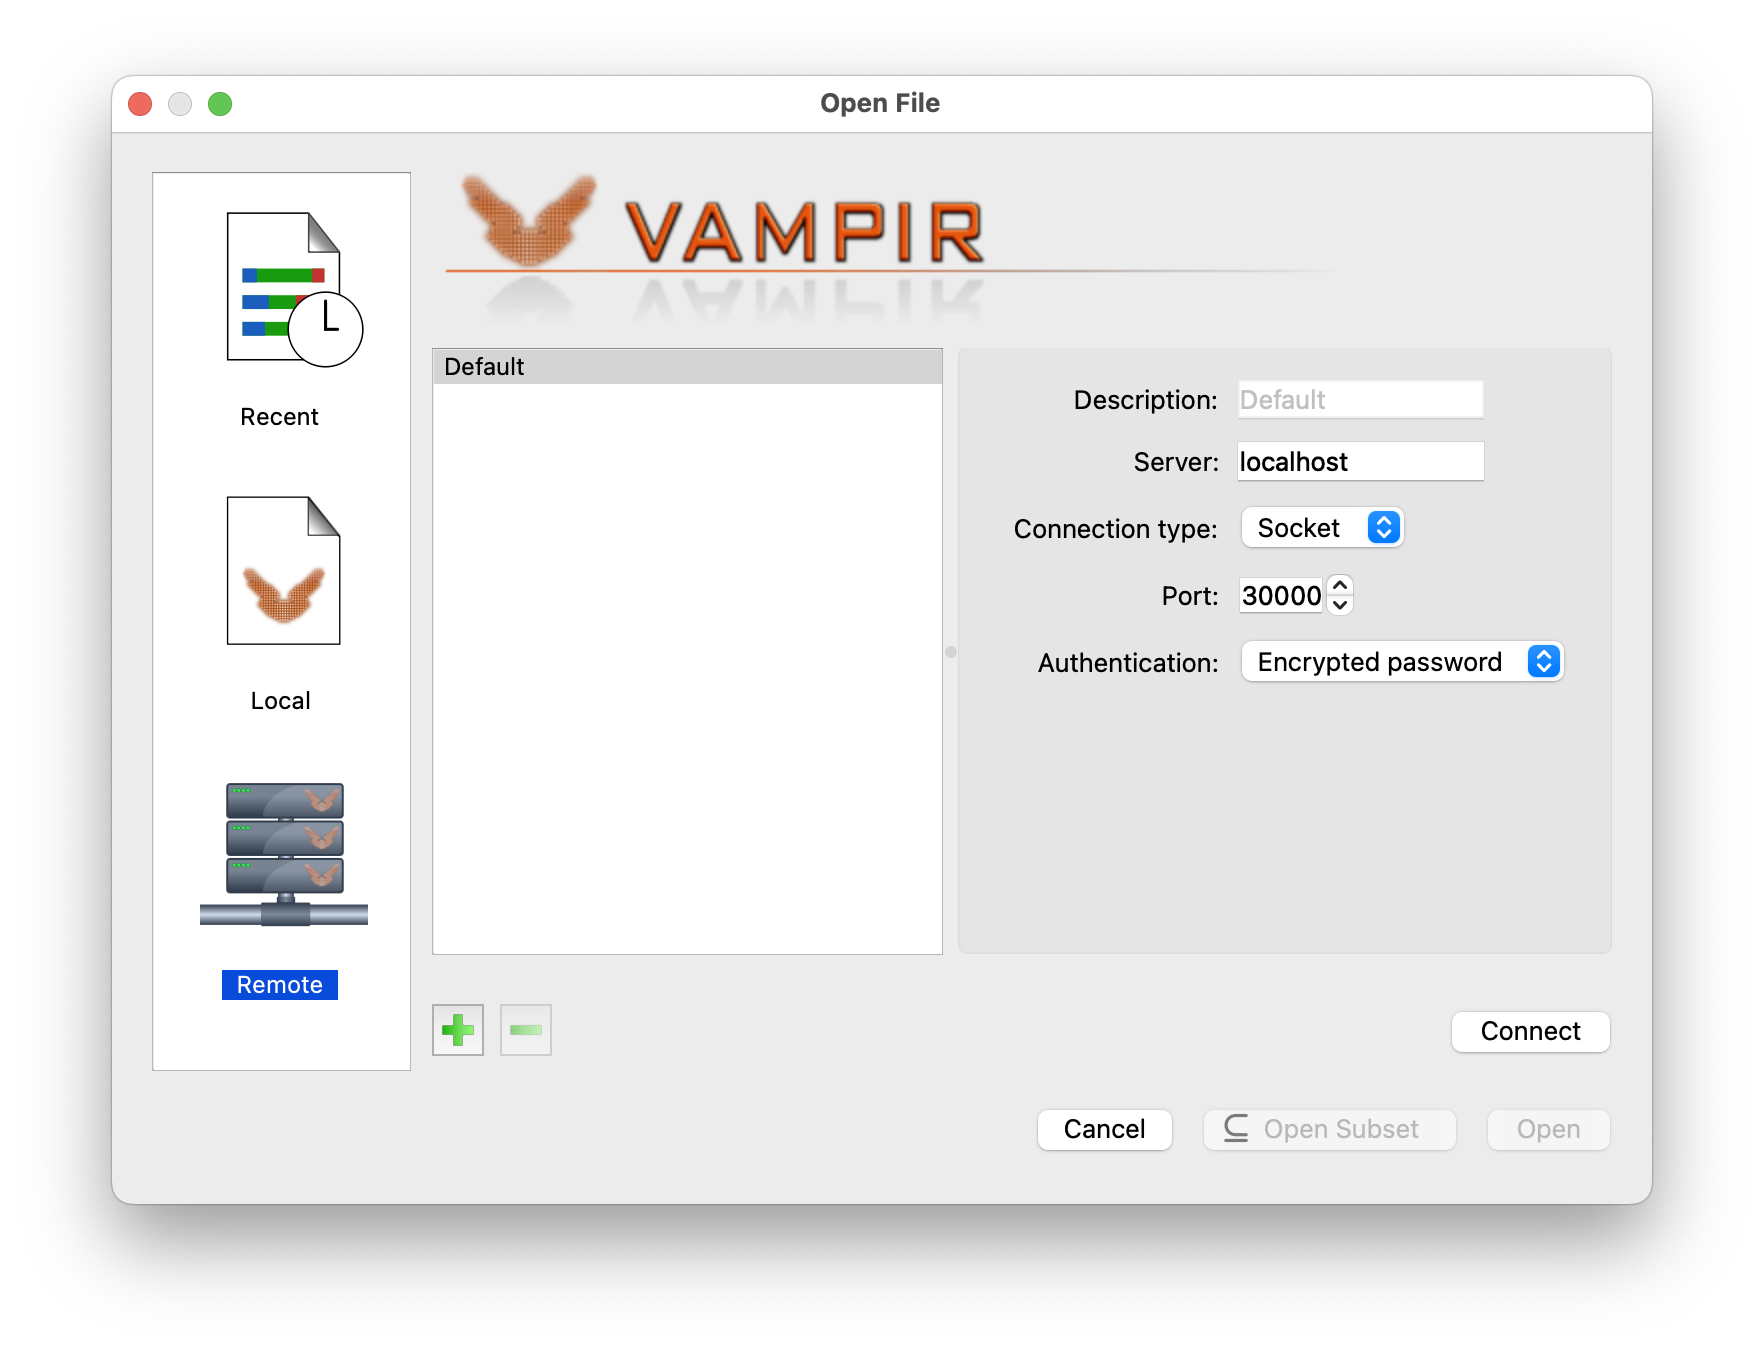
Press ‘Connect’ and this should open the authentication window where you will
enter your User: <USERID> and the Password: <SERVER-PASSWORD> that was
printed by the VampirServer after the successful connection.
Once the authentication step is complete, it should open up the remote filesystem for you to navigate to and load your .otf2 trace file.
If you want to download sample trace files from the Vampir website that can be used for learning and testing Vampir, please visit the following link: https://vampir.eu/resources/sample-traces/ .
Vampir GUI Demo
Please see the 30-minute video below on 2023 Trace-Based Performance Analysis with Score-P + Vampir to get a brief introduction to Vampir and Score-P. This recording is taken from the Frontier Training Workshop (August 2023), presented by Bill Williams, TU-Dresden.
2023 Trace-Based Performance Analysis with Score-P + Vampir from OLCF on Vimeo.